
Built to fit a 21 1/4″ (long) by 17 3/4″ (wide) by 9 1/4″ (high) litter box. The overall dimensions (without legs) are: 39 7/16″ (long) by 20 3/16″ (wide) by 22 7/16″ (high).
In this post, I’ll give you an overview of how I built this project for our cats. If you haven’t watched the build video, check it out here! And get the full printable plans here.
If you’re new here, I’m Elijah! 👋 I spent a decade building software but, like so many, got burnt out and started woodworking. Focusing on practicality, simplicity, and fun, I show you how to build projects that even beginners can do.
⚠️ Power tools are dangerous when used incorrectly. Use proper safety precautions when following the plans. We are not liable for you getting hurt.
🪵 Materials
The full list of materials and how to cut them are included in the printable PDF plans.
- 3/4″ maple plywood
- Vintage furniture legs
- 2 1/2″ narrow hinges
- 1 1/4″ pocket hole screws
- Various grits of sandpaper
🛠️ Tools
Remember: tools don’t make the DIYer, you do! Start with inexpensive tools and buy new ones when they break.
- Circular saw
- Jig saw
- Drill
- Random orbital sander
- Square
- Measuring tape
- Kreg Rip-Cut
- Kreg Pocket Hole Jig
- Square clamps (optional)
- Miter saw (optional)
- Table saw (optional)
- 18 gauge brad nailer (optional)
🪚 Cutting down the wood
The plans will show you exactly what cuts are necessary and are easily adjustable depending on your litter box. If you can’t fit a whole 4’x8′ sheet of plywood in your car, the store can usually cut it down for you. I recommend asking them to leave an extra inch so you can make the final cuts at home.
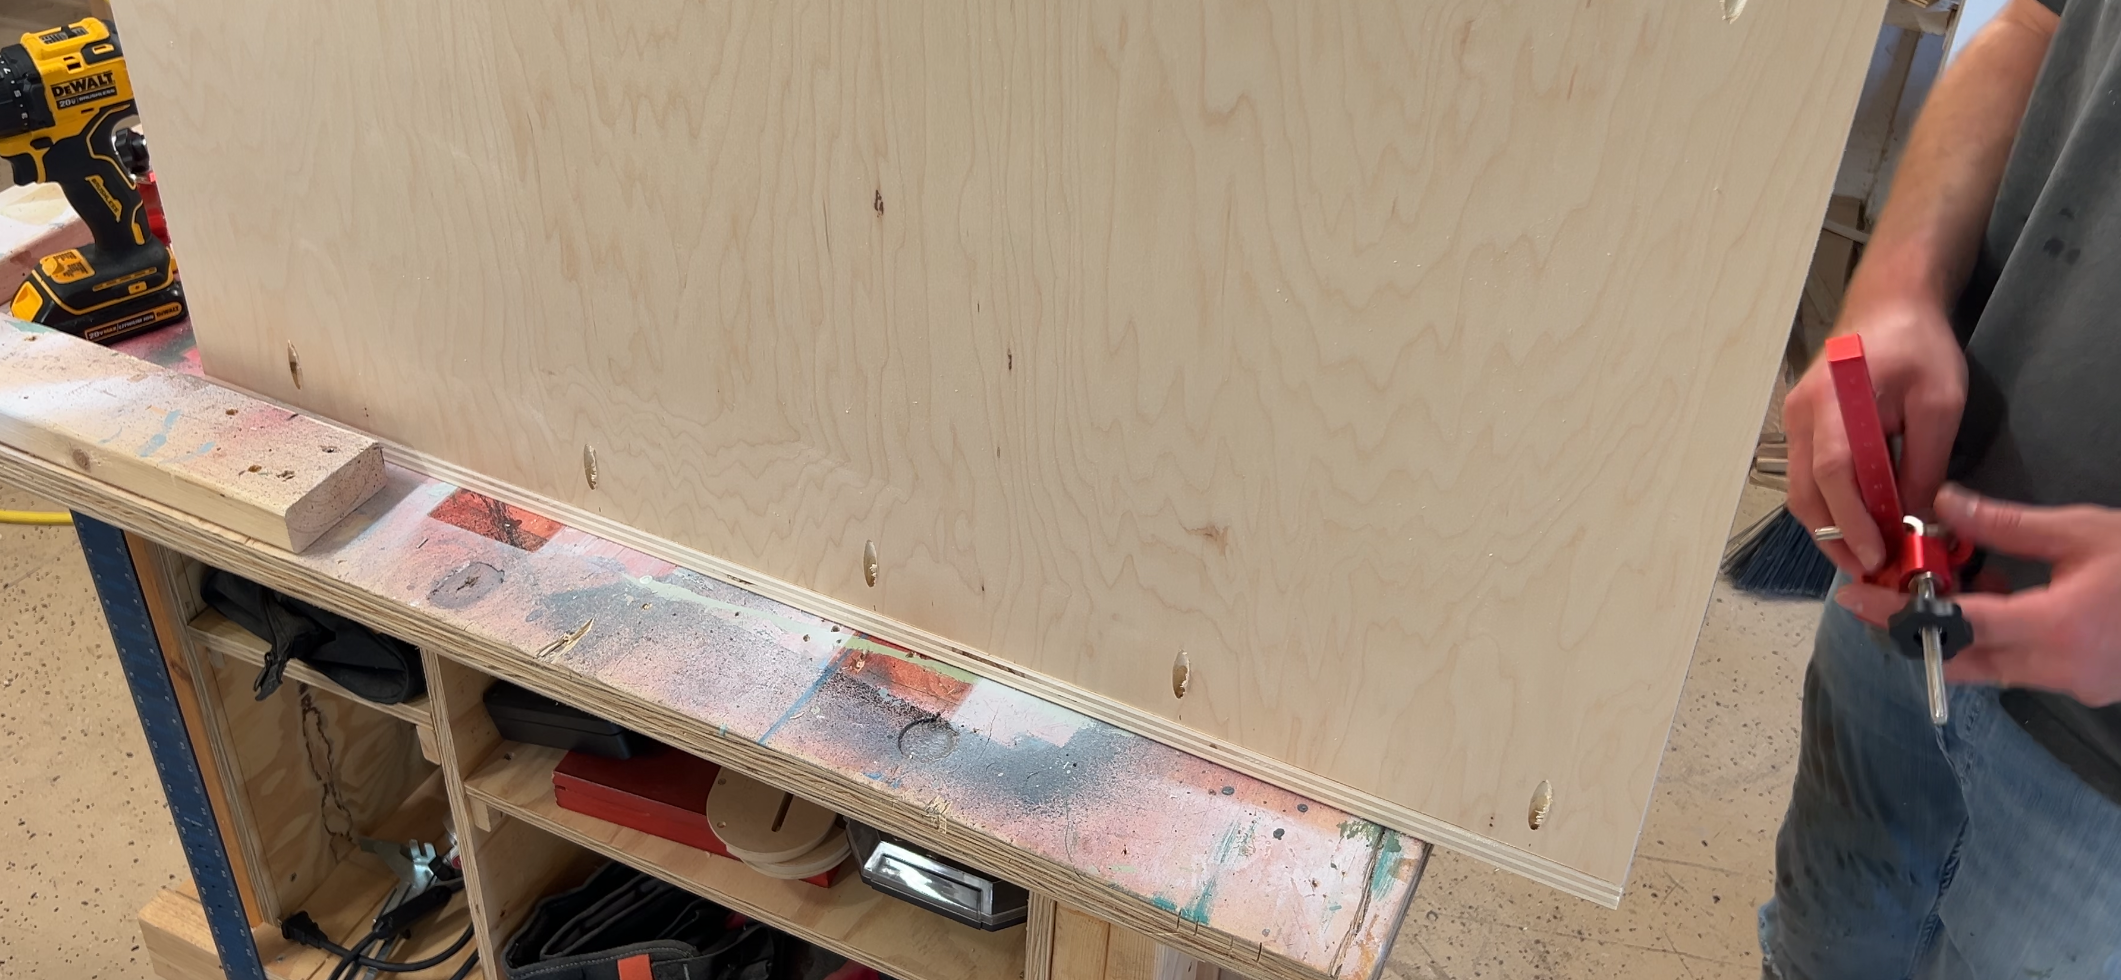
By using the Kreg Rip-Cut, I can make repeatable cuts that are the exact same size! This is great when you don’t have a table saw, or when you need to rip down a large sheet like this. Try to make all the same size cuts at once to avoid changing your setting on the Rip-Cut. Even if your cut is off, they’ll all be the same.
One alternative to using the Kreg Rip-Cut is to use a long straight edge guide. This could be a long 48″ level or even leftover plywood. You just want to ensure you clamp this guide to your plywood sheet while you’re cutting.
After you’ve made all the cuts, you should have 2 long rectangles for the sides, 2 slightly wider rectangles for the top and bottom, and 2 almost squares for the ends. Label each piece with a pencil so you know what they are if you take a break.
🕳️ Pocket holes
Using pocket holes is a great way to get started joining boards together. In the future, I’ll cover other types of joinery like dowels and dados.
Each side piece should get pocket holes on the bottom edge. I accidentally added some to the tops of mine, but we’re using a hinge to keep the top mobile. The square ends get pocket holes on three sides, they’ll screw into the two sides and the bottom.
🚪 Cat Door

Find the center of the piece you want to be your entrance. I made my door 6″ wide and a little over 6″ tall. You can freehand the top arc or trace the bottom of a paint can. You can also print out a template, like this one, and trace it on your board. Be sure to sand this well to avoid sharp edges!
📦 Assembly
There are two ways to assemble this cabinet, depending on if you’re staining or painting it. If you choose to stain it, I’d assemble the pieces with the pocket holes on the inside, so they aren’t visible.

If you paint it, like me, then having the pocket holes on the outside will make assembly a bit easier.
Whatever you choose, be sure to use a square to ensure your pieces are perfectly aligned. The sides should go on easily, but if your end pieces are a bit too wide make sure you’re orienting them the correct way. Our litter box is 21″ high so the 21″ sides should match with the two side pieces. If yours are still too wide, trim them down using the Rip-Cut or table saw.
Corner square clamps make this process a lot easier when you only have two hands. I’m still waiting on a robot arm so I can have a third hand…
⏳ Sanding Pt. 1
Now is a good time to take your random orbital sander and give everything a good sanding with 120 grit sandpaper. My edges didn’t line up perfectly, so I took this time to fix that. If 120 grit isn’t working, you can go down to 80 grit, but be careful! It’s easy to sand through the top layer of plywood if you’re not careful.
🕳️ Fill those pocket holes
If you put your pocket holes on the inside, you can skip to the final sanding.
When painting wood that has had pocket holes, I like to use a wood filler/putty. It’s a super quick way to fill in the pocket holes that’s unnoticeable after sanding and painting.
I also take this time to cover the edges of the plywood with the wood filler. Even though the edges are flat, they have tons of tiny holes and bumps, sometimes even large holes, that will be noticeable after painted.
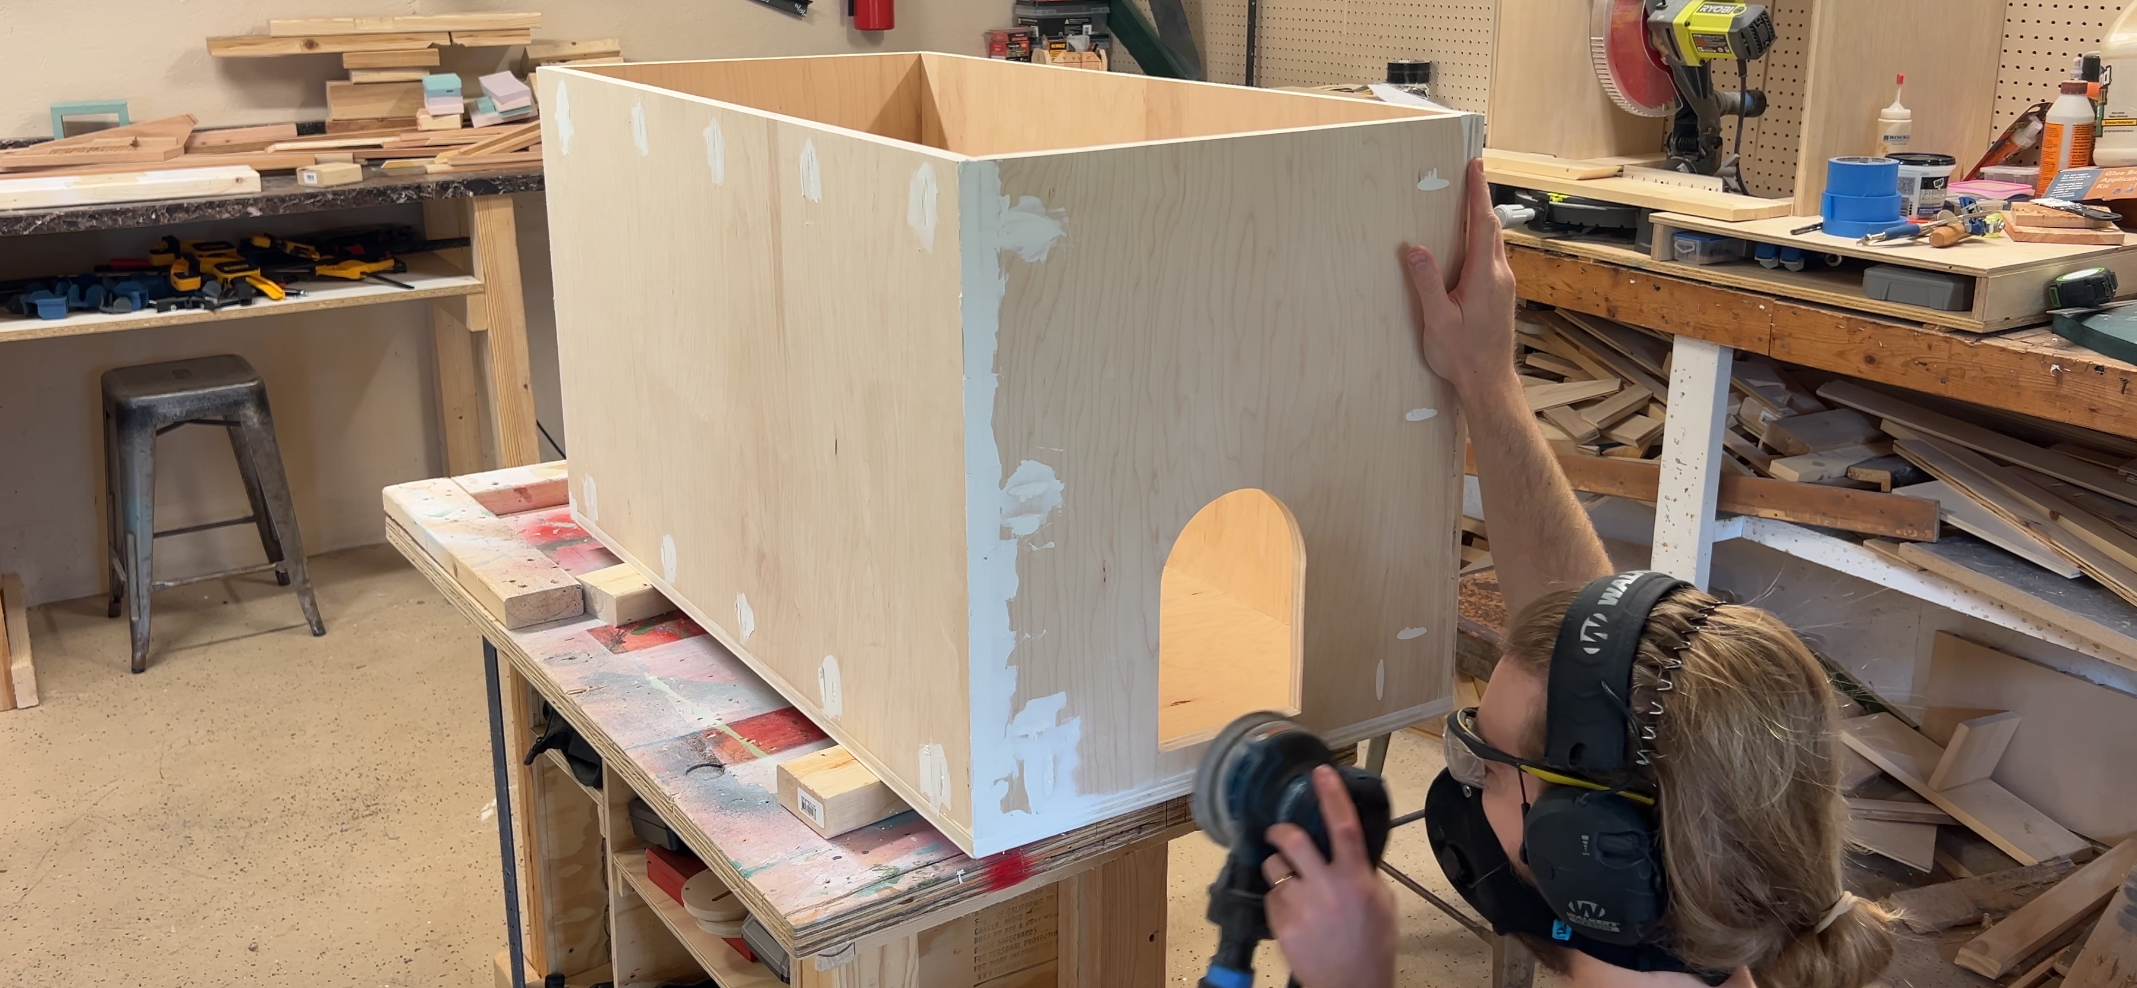
⏳ Sanding Pt. 2
After the wood filler has dried, take some 120 or 150 grit sandpaper on your orbital sander and go over the whole litter box cabinet. Your goal now is to get all the surfaces flat and flush with each other. This is my FAVORITE part! It’s soooo satisfying see all the holes become flush with the plywood.
After you’ve sanded off the wood filler, use 220 grit sandpaper and go over the whole litter box cabinet again. We want all the surfaces to be buttery smooth so our paint goes on just as smooth.
Take some 220 grit sandpaper sheets and hand-sand all the sharp edges. You don’t need to go too hard, we just want to avoid hurting our hands when carrying this. Take this time to smooth out the entrance edges too, don’t want the cats getting hurt either.

📜 Wallpapering
This wallpaper inspired the whole project! Once I bought it, I was so excited to get started building. Peel-and-stick wallpaper is easy to use as long as you work in sections. I used my Cricut scraper to help spread the wallpaper out as I removed the back part. A large putty knife would work well too.

I measured out how long a section needed to be by placing the wallpaper on top of my top piece. I left about 1″ overhang on all sides so I could wrap it over the plywood edges. I had to use two pieces of wallpaper for my top, which caused me to run out before I got to the sides…
I had a bunch of scraps leftover, but not nearly enough to do the whole front side like I had originally intended. This is what I love about building, you make problems then figure out how to solve them in creative ways! I decided to make a picture frame front using the leftover wallpaper and some scrap 1×2 wood I had. This feature turned out to be my favorite part of this whole build!
🖌️ Painting
I used three shades of Mudpaint to paint my cabinet. You can use leftover wall paint or even spray paint. There are a lot of shades of purple on the wallpaper so I used that as inspiration for the paint colors.

I also spray painted my metal furniture legs, making sure to lightly sand them and prime them before spraying on my final color.

💅 Clear coat
Depending on your paint, your clear coat might not be necessary. Cabinet and trim paint is probably OK without a clear coat. Regular wall paint might benefit from a few coats of a clear polyurethane.
I used Mudpaint’s clear coat, which gives a beautiful enamel-like finish.
🪛 Attaching the hardware
After the clear coat dried, I moved on to attach the legs and hinges. For both of these steps, I pre-drilled holes for the screws using a drill bit slightly smaller than the screws. This helps prevent the wood from splitting when adding screws close to the edge of the wood. It’s also good practice to pre-drill all the time when using hardwood to prevent splitting.
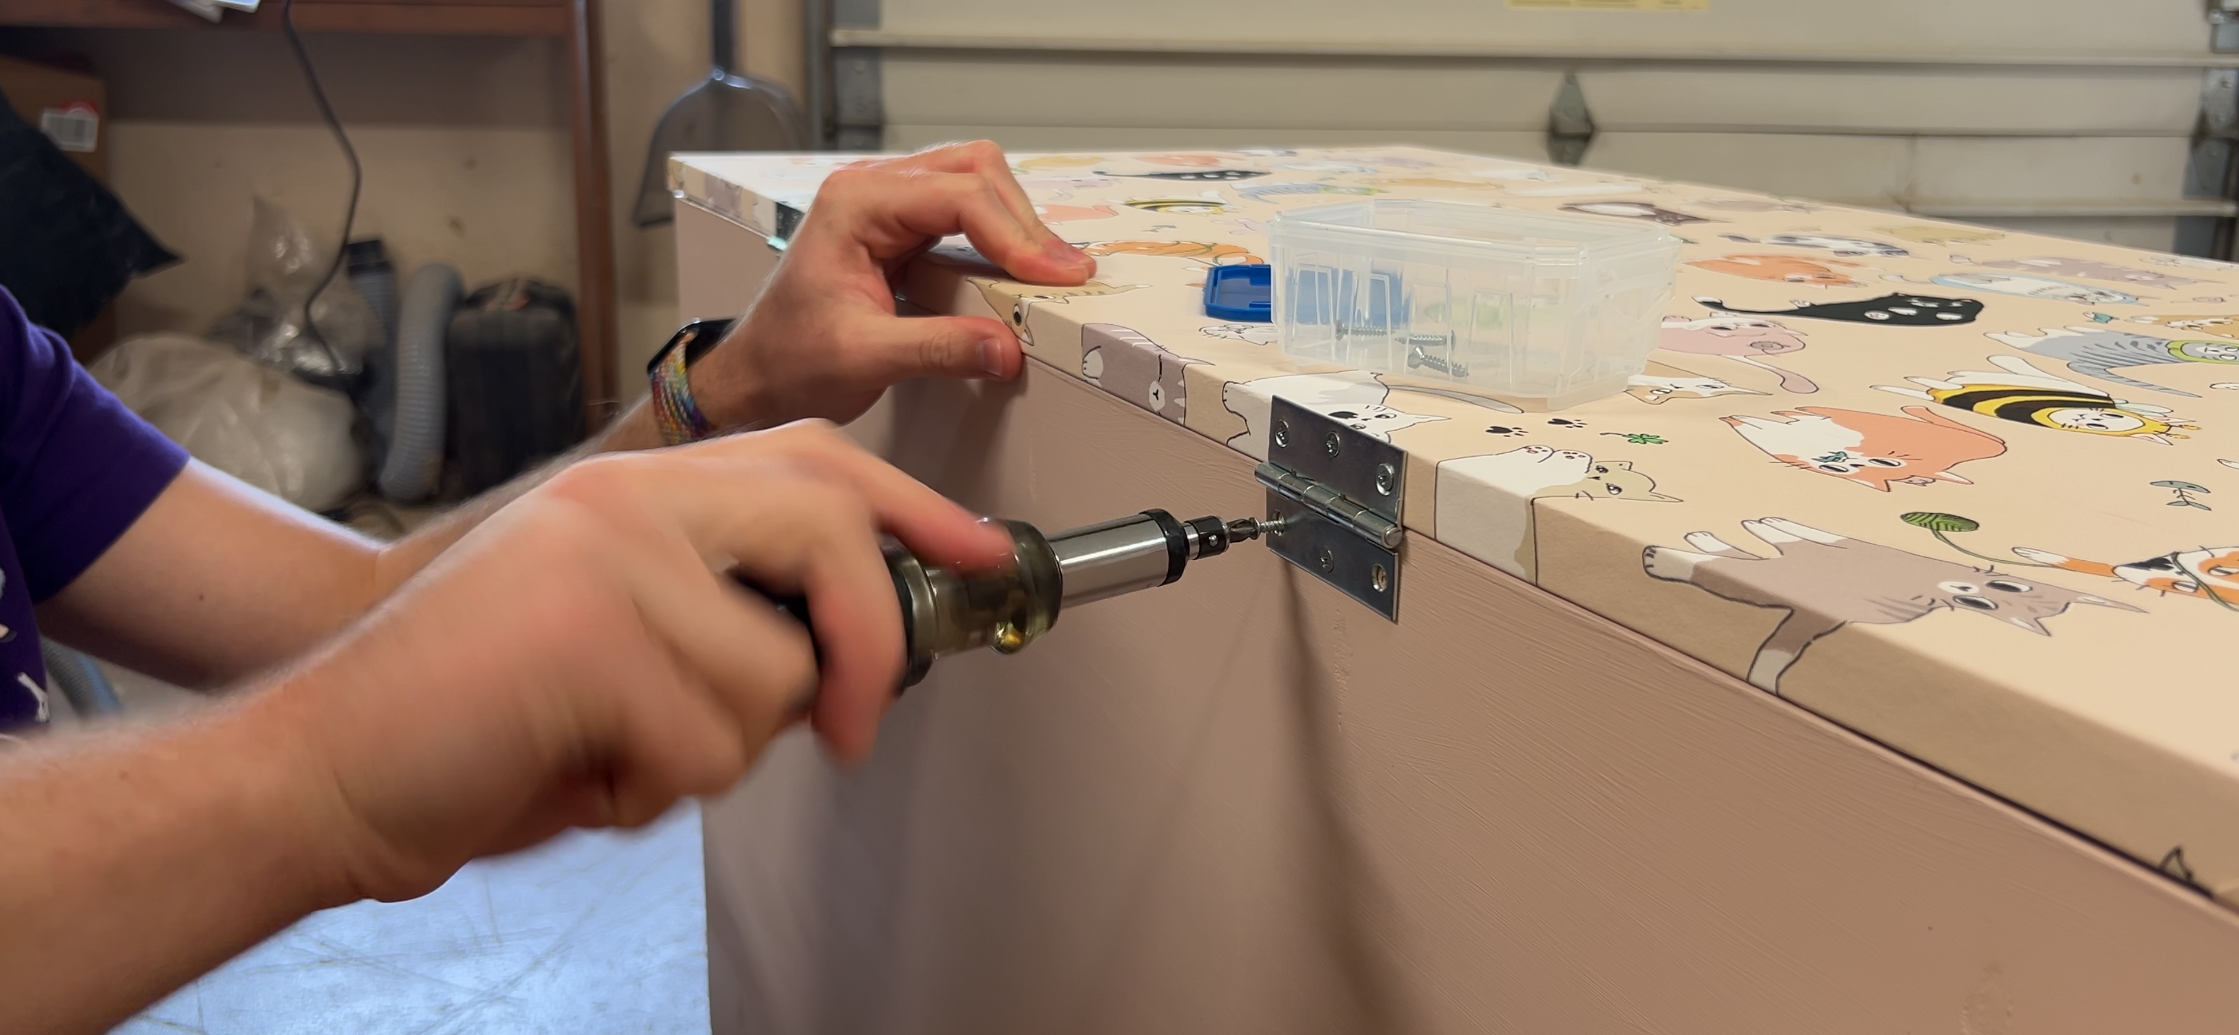
I used two 2 1/2″ narrow utility hinges for my top. They poked over the top just slightly, but it’s not noticeable. I also added some cabinet bumpers to the top to prevent scratching. I might add some gas spring hinges in the future to make it even easier to use.
🎉 YOU DID IT!
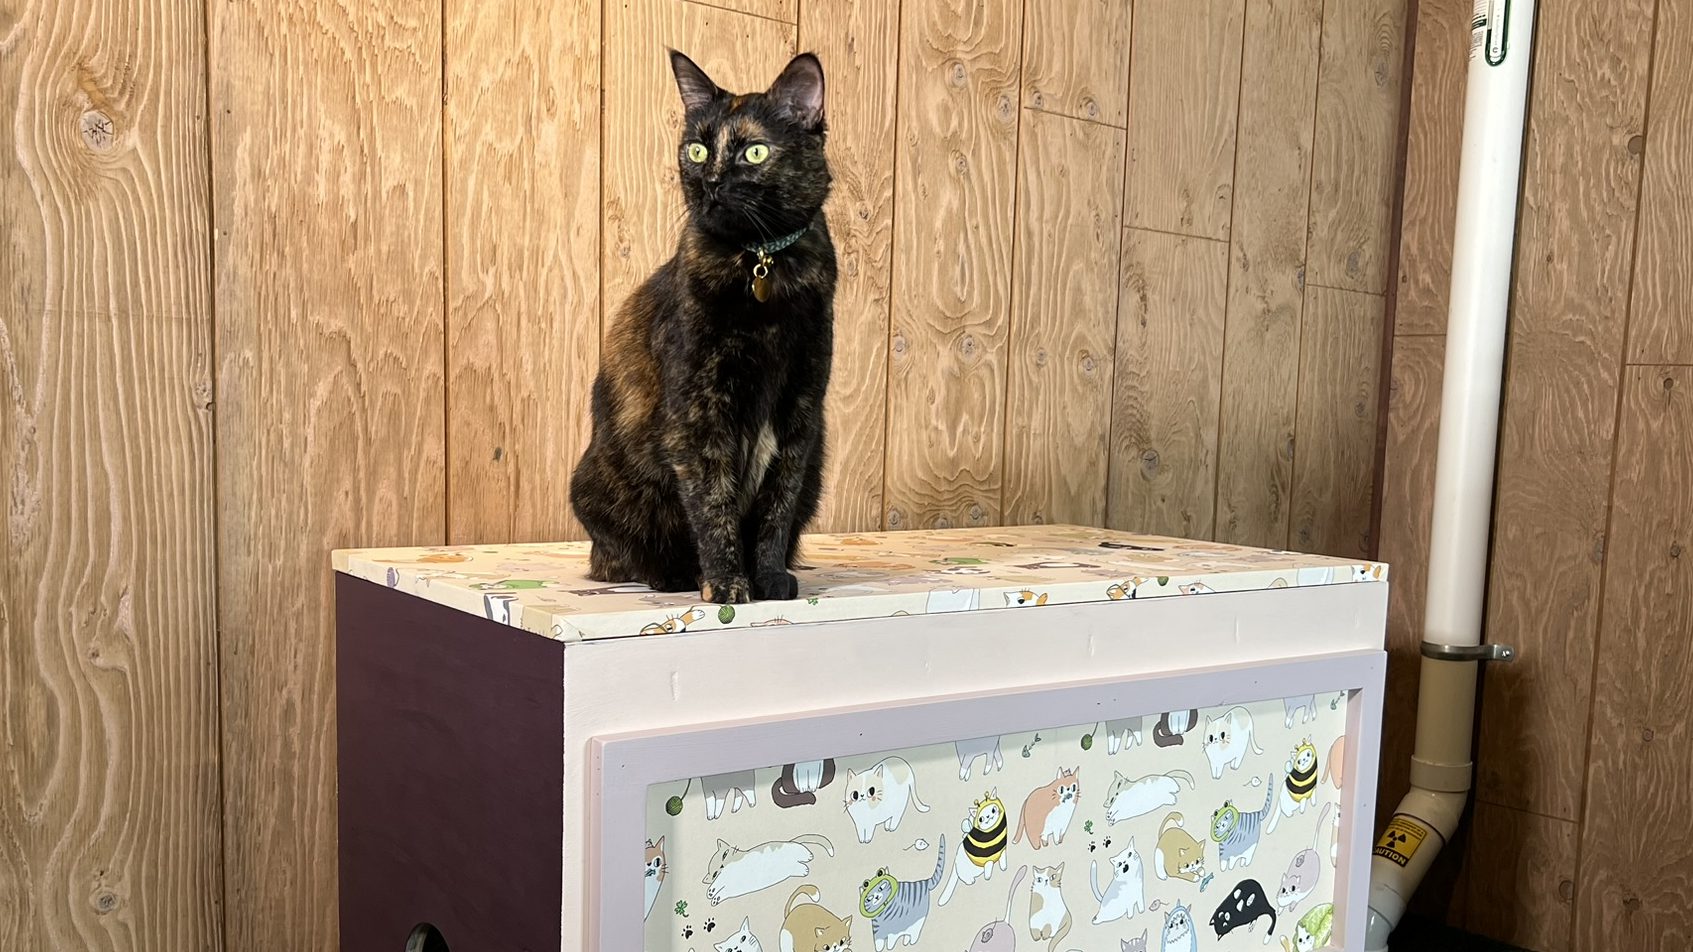
Whether this was your first project or tenth, I’m so proud you made it to the end! I had a ton of fun building this and our cats already love using it. If you built this, share it on social media with #EnbyDIY and you might get featured in my next video!
If you haven’t watched my build video, check it out below 👇
▶️ Watch the video
The printable PDF plans walk you through, step-by-step, how to make each cut and assemble each piece. There are two versions of the plans. The large version requires two sheets of 4’x8′ plywood and is what I built in the video. The smaller version requires only one sheet and still fits the same size litter box.
You can get 50% off all of my plans by joining my community! Visit my website here and become a supporting member. You’ll get exclusive behind-the-scenes content and discounts on all DIY plans.

Leave a comment