Tools can be the most expensive and overwhelming part of getting started as a DIYer, but they don’t have to be! This guide will show you my recommendations of where to look and what to buy.
I think of tools in a few categories: main power tools, supporting tools, and jigs. These categories overlap since you might need a power tool to use the jig. My rule of thumb is to put off buying a new tool or jig until it’s obvious that acquiring the tool will make my life 10x easier. I want to know why the tool or jig is needed before buying it. You can have a shop full of tools but if you don’t know when and how to use each effectively, they’re worthless. This guide is short because once you have all of these tools, you’ll know the next tools you want to buy.
Let’s start with the main tools. These will be the most expensive per tool, so I recommend starting at the beginning and only buying the next tool on the list when you’re ready.
- Drill
- Random Orbital Sander
- Circular Saw
- Miter Saw
- Jig Saw
Next up we have the supporting tools. You can buy these all together or when you know you’ll need it. These tools help you mark, measure, and align your builds.
- Screwdriver
- Measuring Tape
- Speed Square
- Bar Clamps
- 12″ & 48″ Level
- Square/Corner Clamps
Lastly, we have the jigs. These can be expensive so I recommend only buying them when you have a project that requires them.
- Rip-Cut (requires a circular saw)
- Pocket Hole Jig (requires a drill)
- Accu-Cut (requires a circular saw)
Many of these tools also have consumables, such as saw blades, sandpaper, and screws.
Where to buy tools?
Your first tools should come used, whether that’s from a friend or from FB Marketplace. I recommend this for a few reasons. If you don’t enjoy DIY or don’t have time for it after a month, you will have lost very little money on tools. You can resell them on FB Marketplace for around the same as you bought them. You’ll be able to build the same things I show you with a $20 drill or a $300 drill. When the $20 drill dies, then it’s time to upgrade to a nicer one (maybe not the $300 one though…).
When looking for tools, here’s the approach I recommend:
- Ask family and friends if they have some tools they don’t use anymore. You’d be surprised how many people have forgotten tools in their garage or basement.
- Look on FB Marketplace and Craigslist. Older tools last a long time and estate sales may have some great deals.
- If I can’t find what I’m looking for, I’ll check Harbor Freight next. Their tools are usually high quality and generally less expensive than Home Depot or Lowe’s. I always buy these in person at the store so I can verify the quality of the tool.
- The home improvement store is my last stop if I can’t find the tool anywhere else. Even here there is a range of price and perceived quality. Start with the inexpensive models and brands first. There may be some reviews saying they’re poor quality, but I’ve had good experiences with all the brands.
Battery vs Corded
Corded tools will be less expensive than the battery ones, even with an extension cord. You’ll have to be a bit more careful when using a corded circular saw or jig saw, to not cut the cord, but it can be well worth the cost difference.
When buying battery powered tools, each brand has it’s own battery format. This is possibly the dumbest thing about cordless tools. Most of my cordless power tools are Dewalt, but my landscaping tools are a mix of brands. If you wait for a sale, you can get the cordless power tools with a battery for the same price as without a battery. That’s generally what I did, and I haven’t regretted it. When you’re at the store, check the clearance rack, they may have extra batteries on sale (I’ve seen them up to 60% off).
Consumables
The first time I bought a new saw blade, I almost fainted when I saw it was over $40. When searching online, you’ll likely find the high-end saw blades and similar consumables. When you go to the store, look around in the same aisle to see if there’s the same blade in a different brand for less. For example, I was looking to buy a dado blade set and found the typical Diablo brand first. I know they’re high quality blades, but $115 was out of my price range. Right next to it, I found the “off-brand” set for half the price.
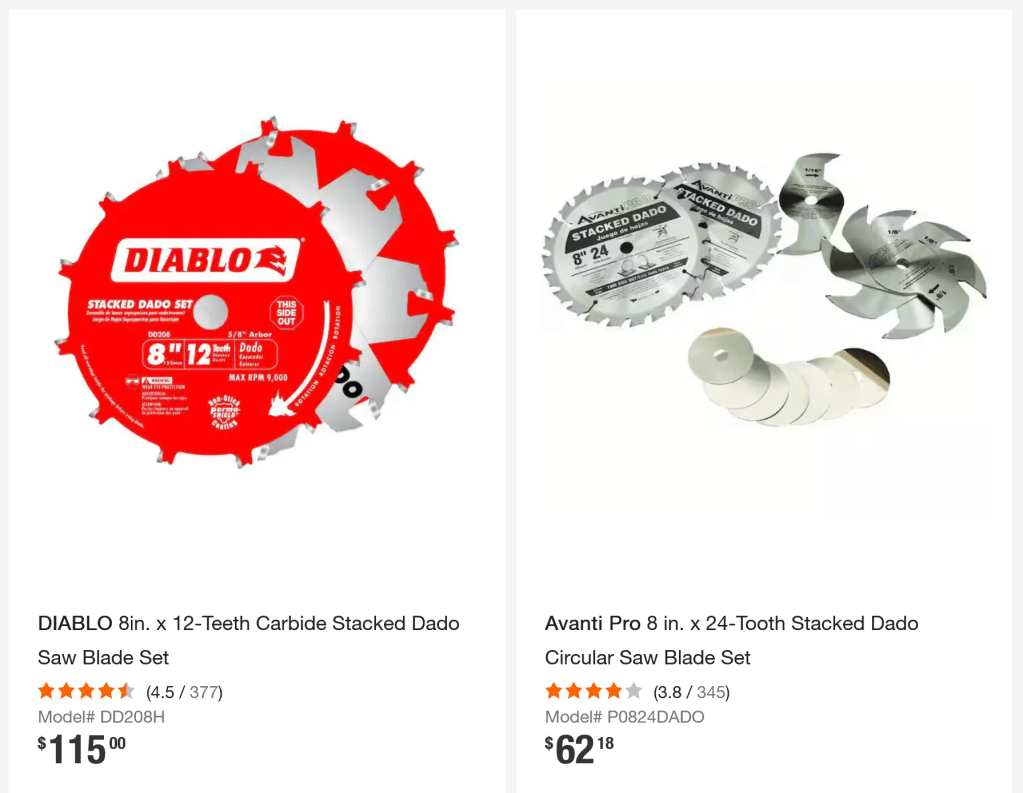
I’ve been using the Avanti set for a year now and it works great every time.
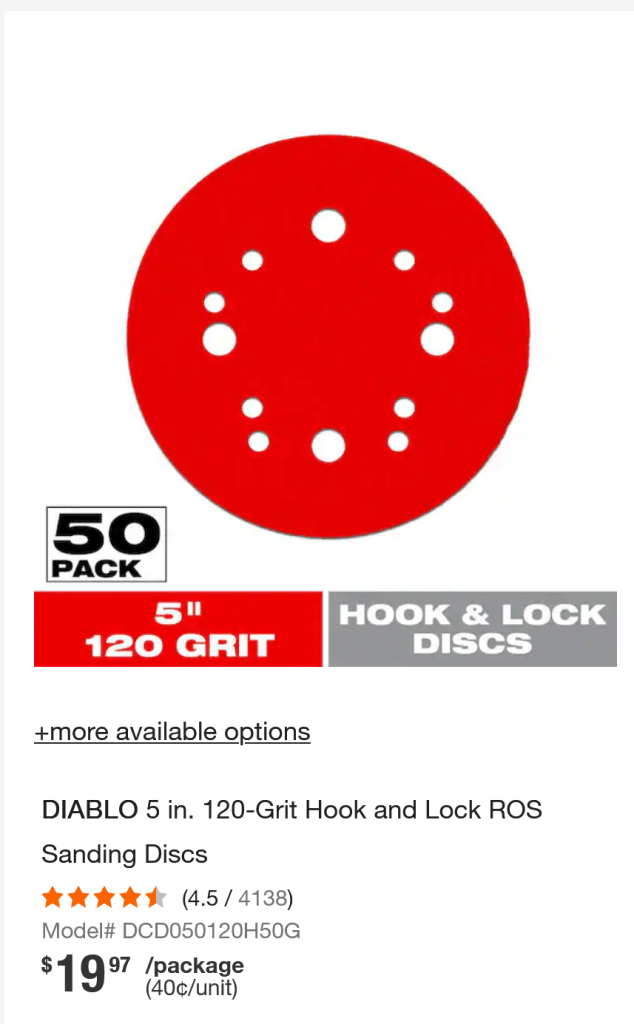
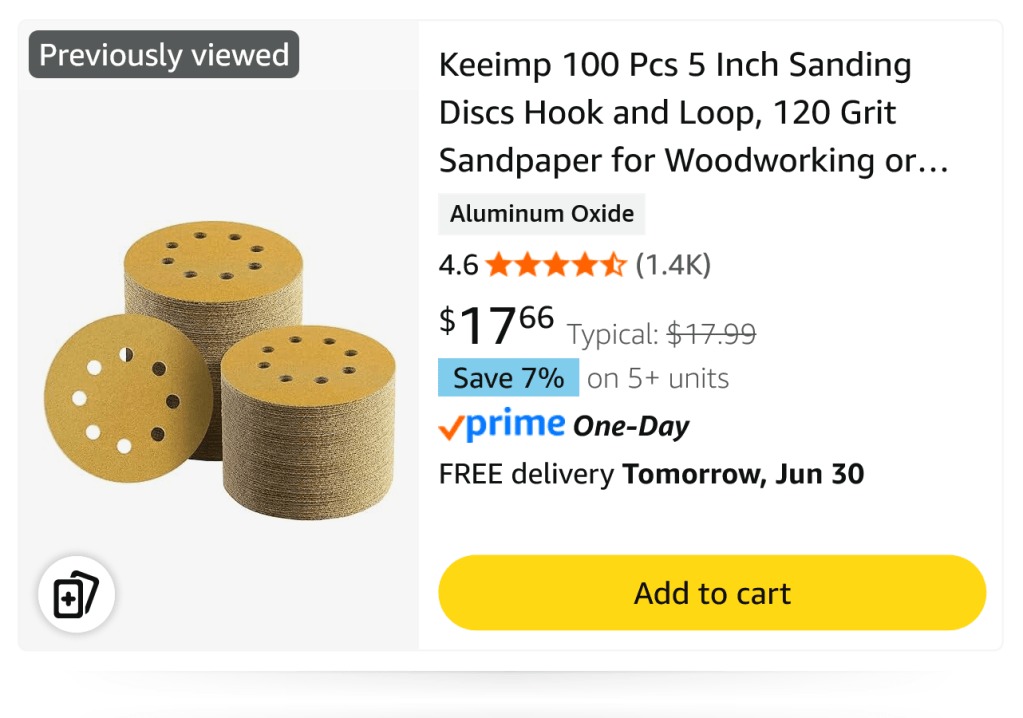
Similarly, for sandpaper, you can buy it at the home improvement store, but you get just a few sheets. I get double the amount for less on Amazon. The Diablo sanding discs seem to last a little longer, but not twice as long. I also feel better about doing the right amount of sanding rather than trying to get every last bit out of the expensive ones.
Thankfully screws are just screws, and I don’t mind buying these at the home improvement store. I start with the 1 lb box and see how long it lasts me before deciding to buy the 5 lb box. Screws can be a bit confusing when looking. For furniture building, using regular construction screws for interior builds and deck screws for exterior builds. Pocket hole screws are clear about which are for inside and outside. When building something structural (like a wall or deck), use the appropriate screws rated for what you’re building.
Next to screws, glue will likely be your next biggest consumable. I bought a 1 gallon bottle of Titebond III and it’s lasted me over a year. When I need some more, I’ll likely do the same thing and buy another gallon of Titebond III. It’s interior and exterior waterproof glue that’s also (indirect) food safe. I don’t need to think about what glue I need to use for a project, it’s always the same. The alternative would be Titebond II which is also interior and exterior rated, as well as (indirect) food safe. The downside is that it’s water resistant rather than waterproof. This means that the glue joints will fail if subjected to regular water, like a planter or outdoor furniture.

Leave a comment