
This project is a great way to celebrate pride month all year long! Each flag can be built in an afternoon and hung up the next day. I’ll show you two different methods to join the boards (spoiler: dowels were my favorite), and show you how to hang them up. We’ll be using lots of spray paint, so I recommend doing this outside and wearing a respirator (like this one). You can get the plans to build BOTH of these flags for free over here.
Like many of my plans, I have a variety of ways to build these depending on the tools you have. It’s possible to build these flags using only the boards and glue, you can even have the boards cut to size at the store for you. This is the BEST beginner DIY project. If you don’t have a table saw, you can follow this other post.
We’ll be ripping down our boards on the table saw, this will make the size of both flags 24″ tall by 36″ wide.
🪵 Materials
Both flags
- Round Clear Cabinet Bumpers
- Picture Frame Wire
- Wood Glue (I like Titebond III)
- Spray paint primer
- Wood filler
LGBT Pride Flag
- 2x 1x6x10 Pine Boards
- 2x Large D-Ring Hangers
- Spray paint (one can each is enough)
Non-binary Flag
- 2x 1x8x8 Pine Boards
- 2x Large D-Ring Hangers
- Spray paint (one can each is enough)
🧰 Tools
The tools required depend on how you join your boards. Each section below allows you to choose your joinery method. The simplest is wood glue and clamps, I’d recommend this approach if you’re unsure.
All Joinery Methods
- Miter saw
- Bar or pipe clamps (throat depth of at least 24″)
- I made my own by using these pipe clamps and this pipe
- Quick release clamps (I have this set, but any will work)
Clamps & Glue
- No additional tools needed!
Dowels
- Dowel jig
- 3/8″ drill bit
- Drill
- Speed square or ruler
Pocket Holes
- Pocket hole jig
- 1 1/4″ coarse pocket hole screws
- Drill
🪚 Cutting the Boards
I cut these boards by setting up a stop block at 36″. You can do this by measuring 36″ on your first board then set your stop block so your miter saw will cut at 36″. For this project, being exact at 36″ isn’t super important. It’s more important that each board is the same length.
For the LGBT pride flag, cut 6 pieces at 36″ from the 1x6x10 boards.
For the non-binary pride flag, cut 4 pieces at 36″ from the 1x8x8 boards. Depending on your miter saw size, you may need to flip the board to finish the cut if your saw doesn’t cut completely through.
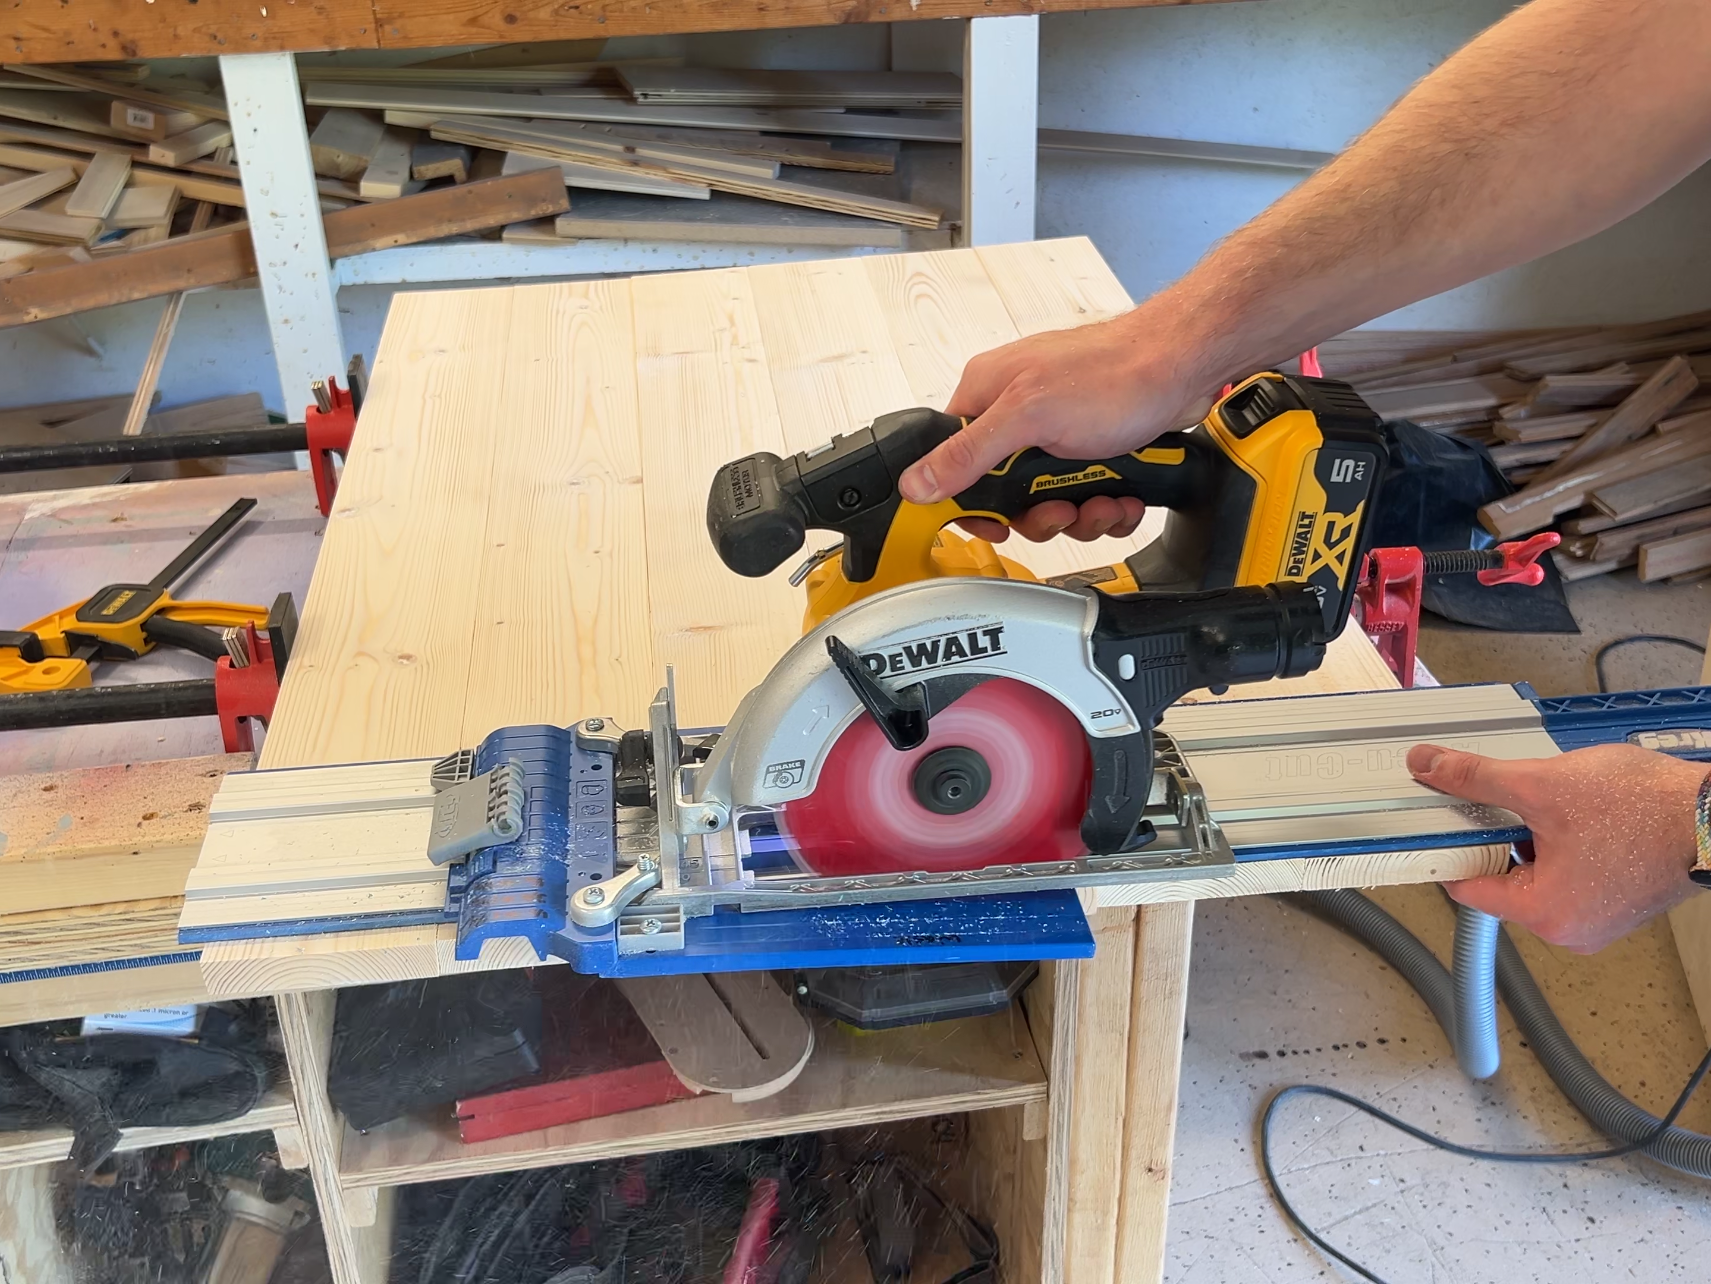
Ripping the Boards
Our boards are too wide at this point and will be much larger than the 24″ height when put together. To get them down to size we’ll use our table saw. Be sure to use a push stick and keep your fingers clear!
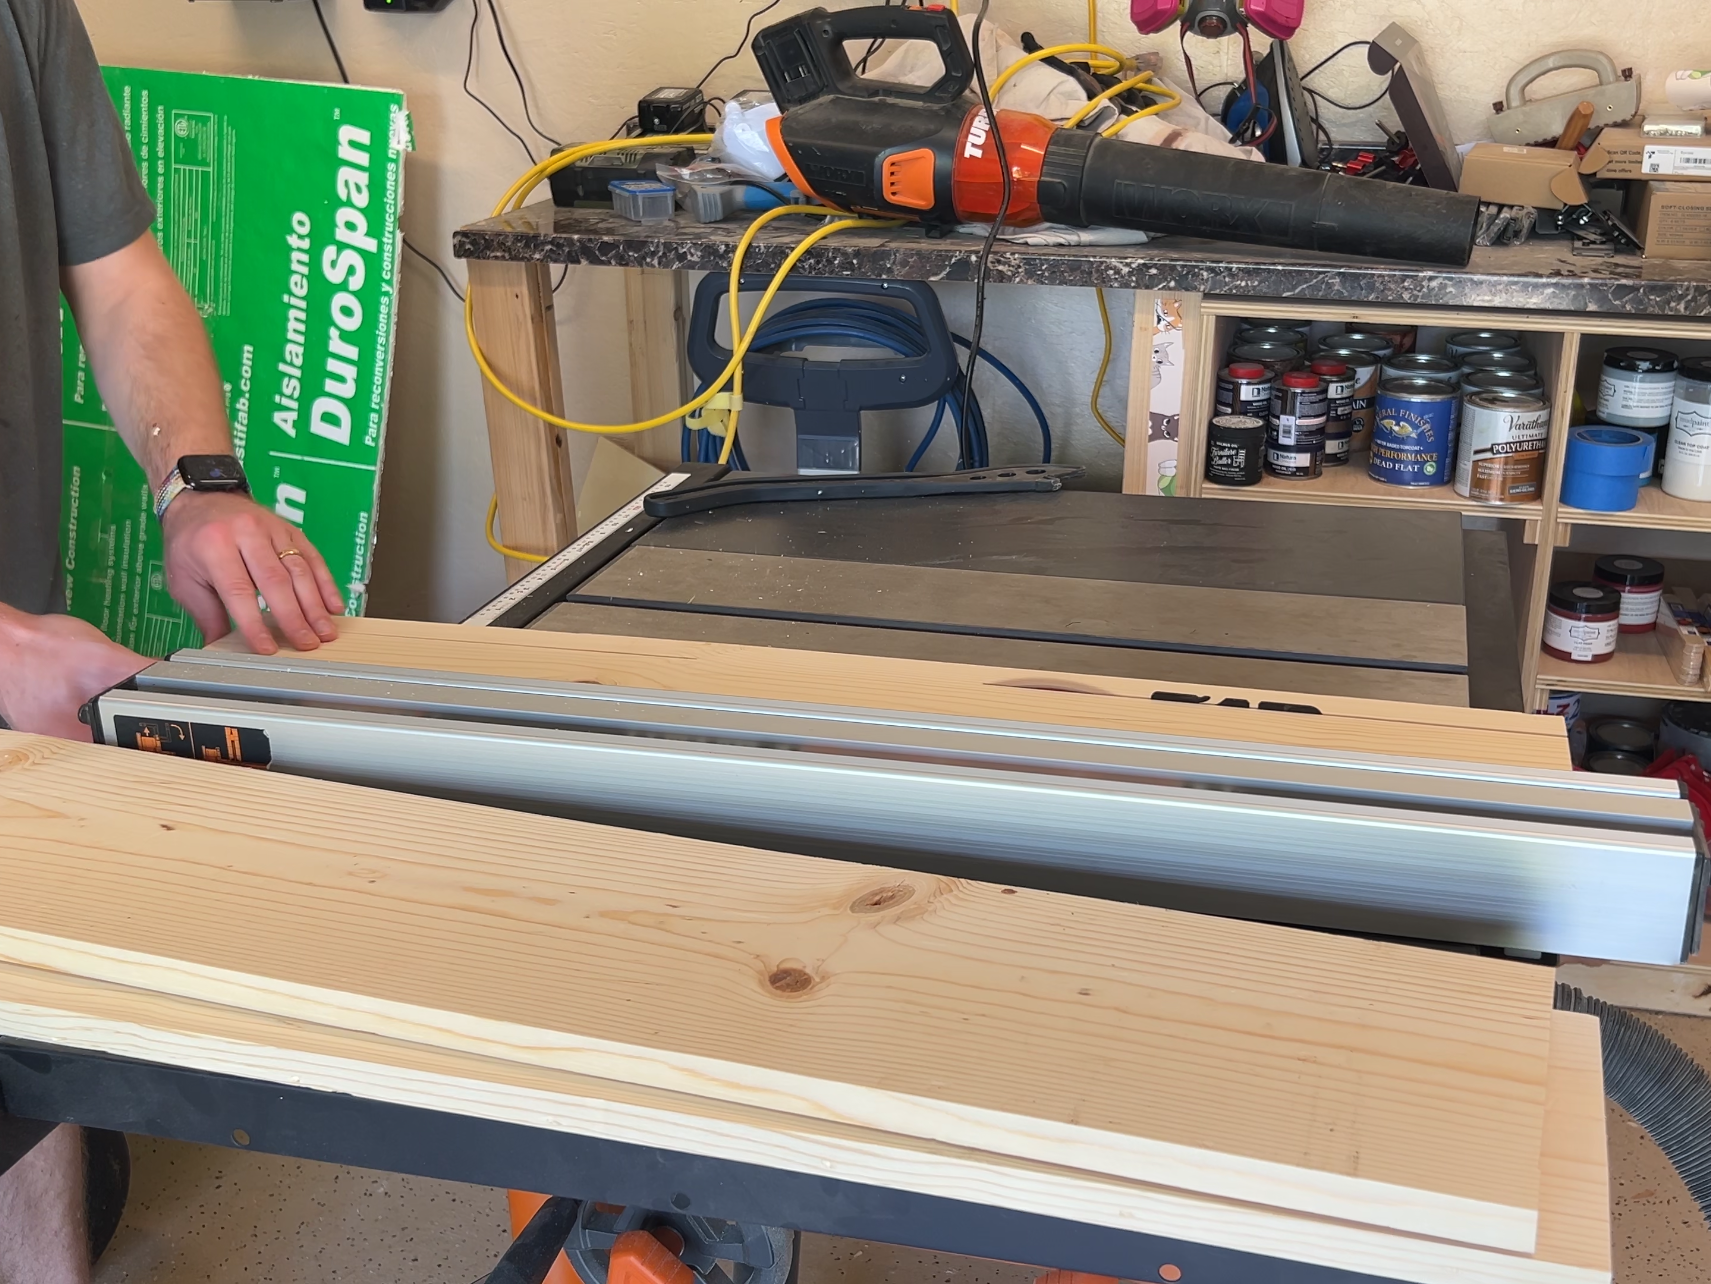
For the LGBT pride flag, set your table saw to 4″ and rip all 6 boards down to this width.
For the non-binary pride flag, set your table saw to 6″ and rip all 4 boards down to this width.
📦 Assembly Prep
All Methods
Depending on the wood you bought, it may have some holes and knots. I used a wood filler to fill these in to get a flat surface. If you don’t fill these in, they will be visible after painting.
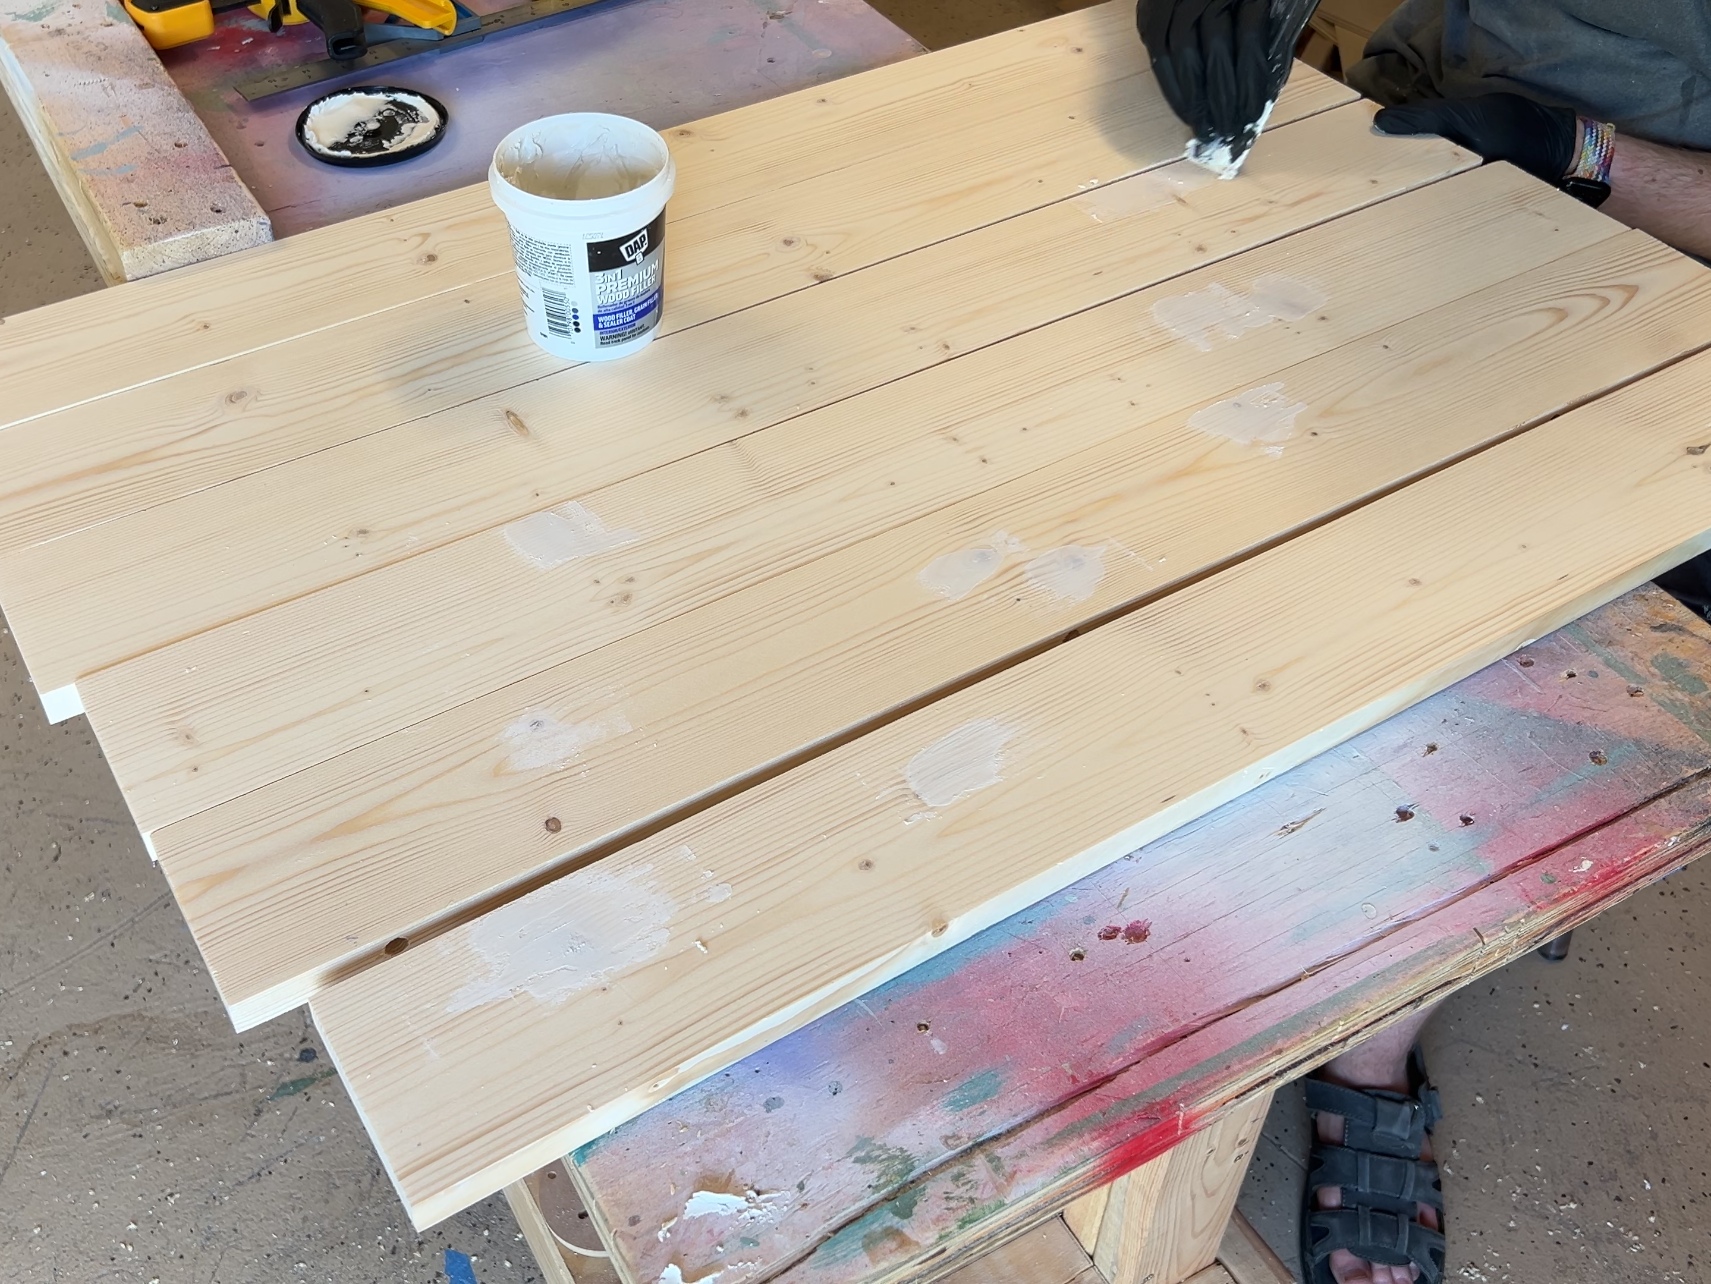
Start by sanding all of your boards with 120 grit sandpaper on your orbital sander, just sand the tops and bottoms. Then sand with 220 grit sandpaper. Finally, hand-sand the sharp edges with 220 grit sandpaper.
Now is a good time to line up the boards to see how they look best. I tried to make sure my flag would be as flat as possible on the side that would be seen. After figuring out this layout, I labeled the boards on the back side with a number and an arrow so I knew which side was the top side.

Glue and Clamps
You’re all set! Move on to the painting step.
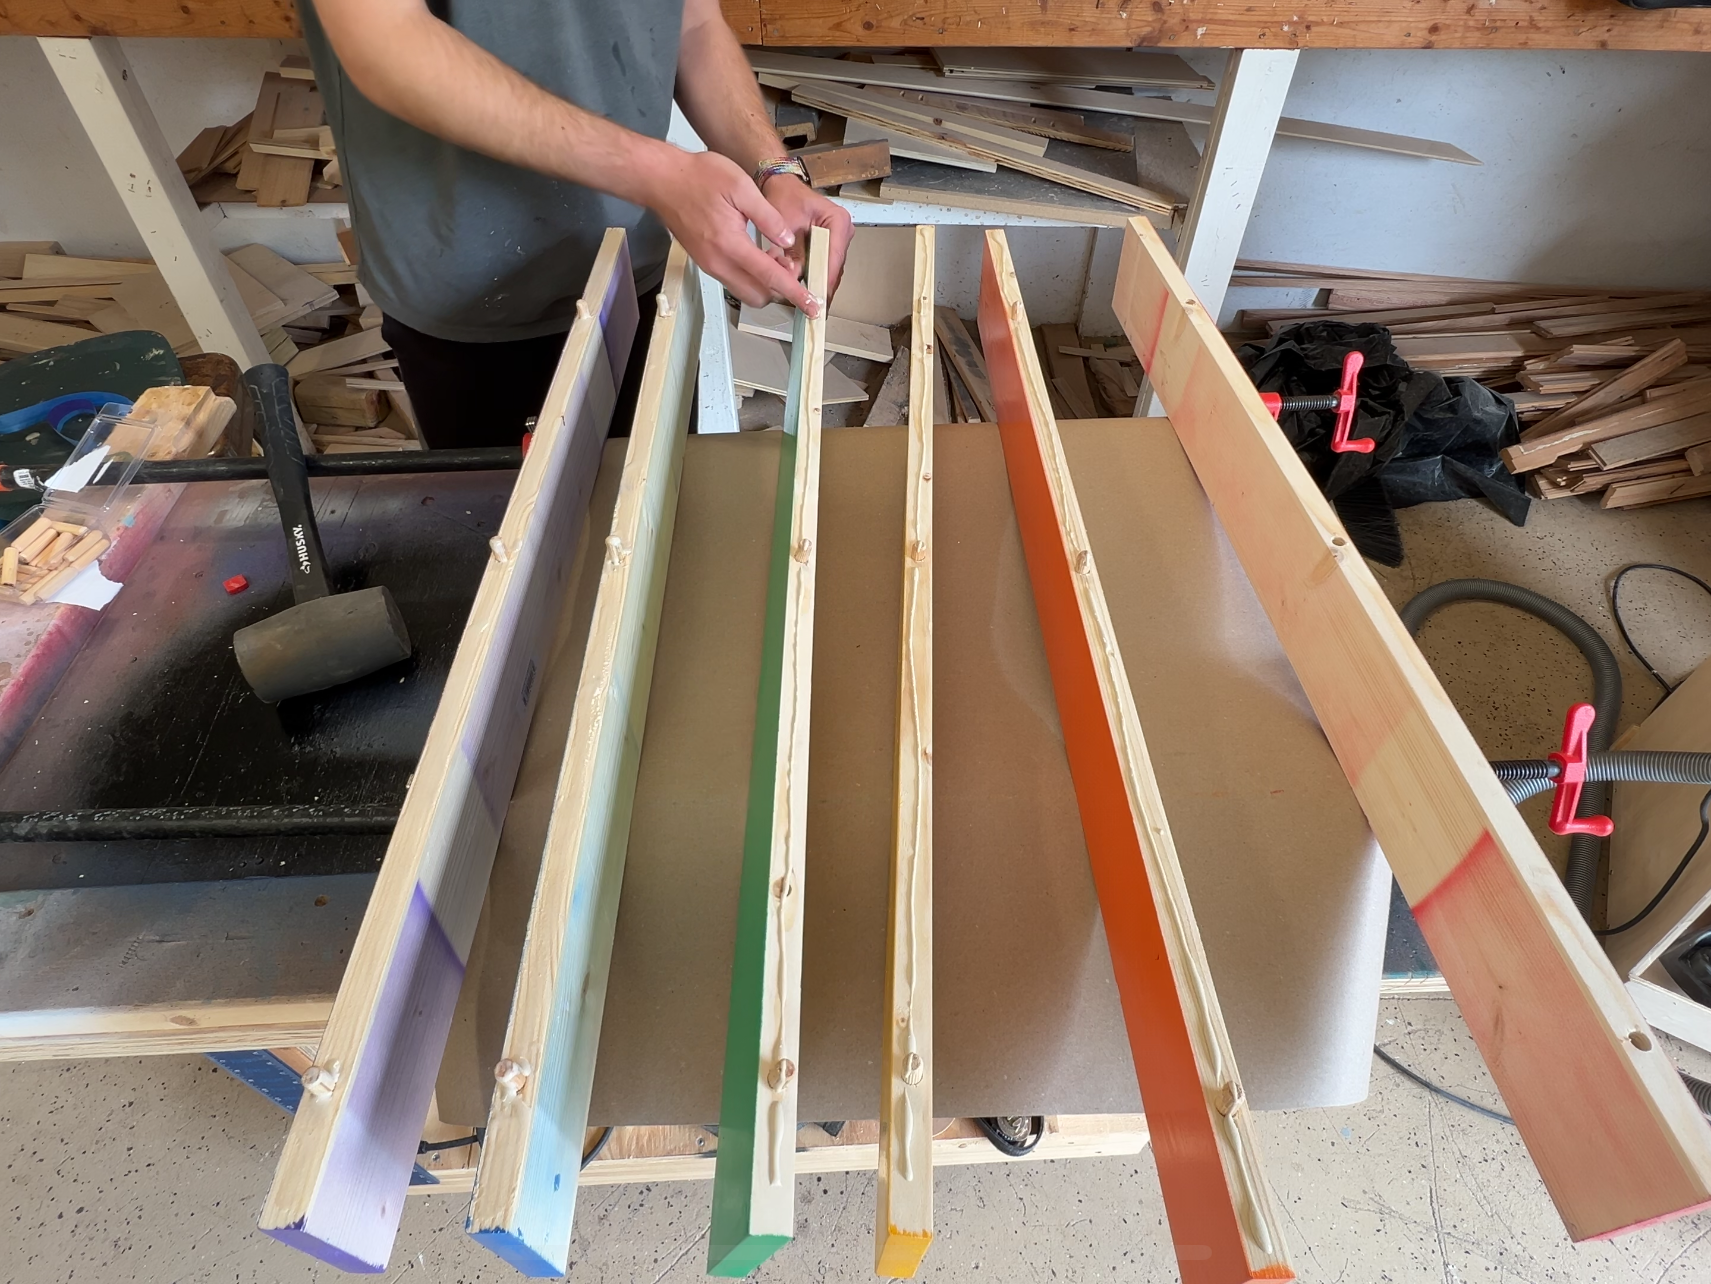
Dowels
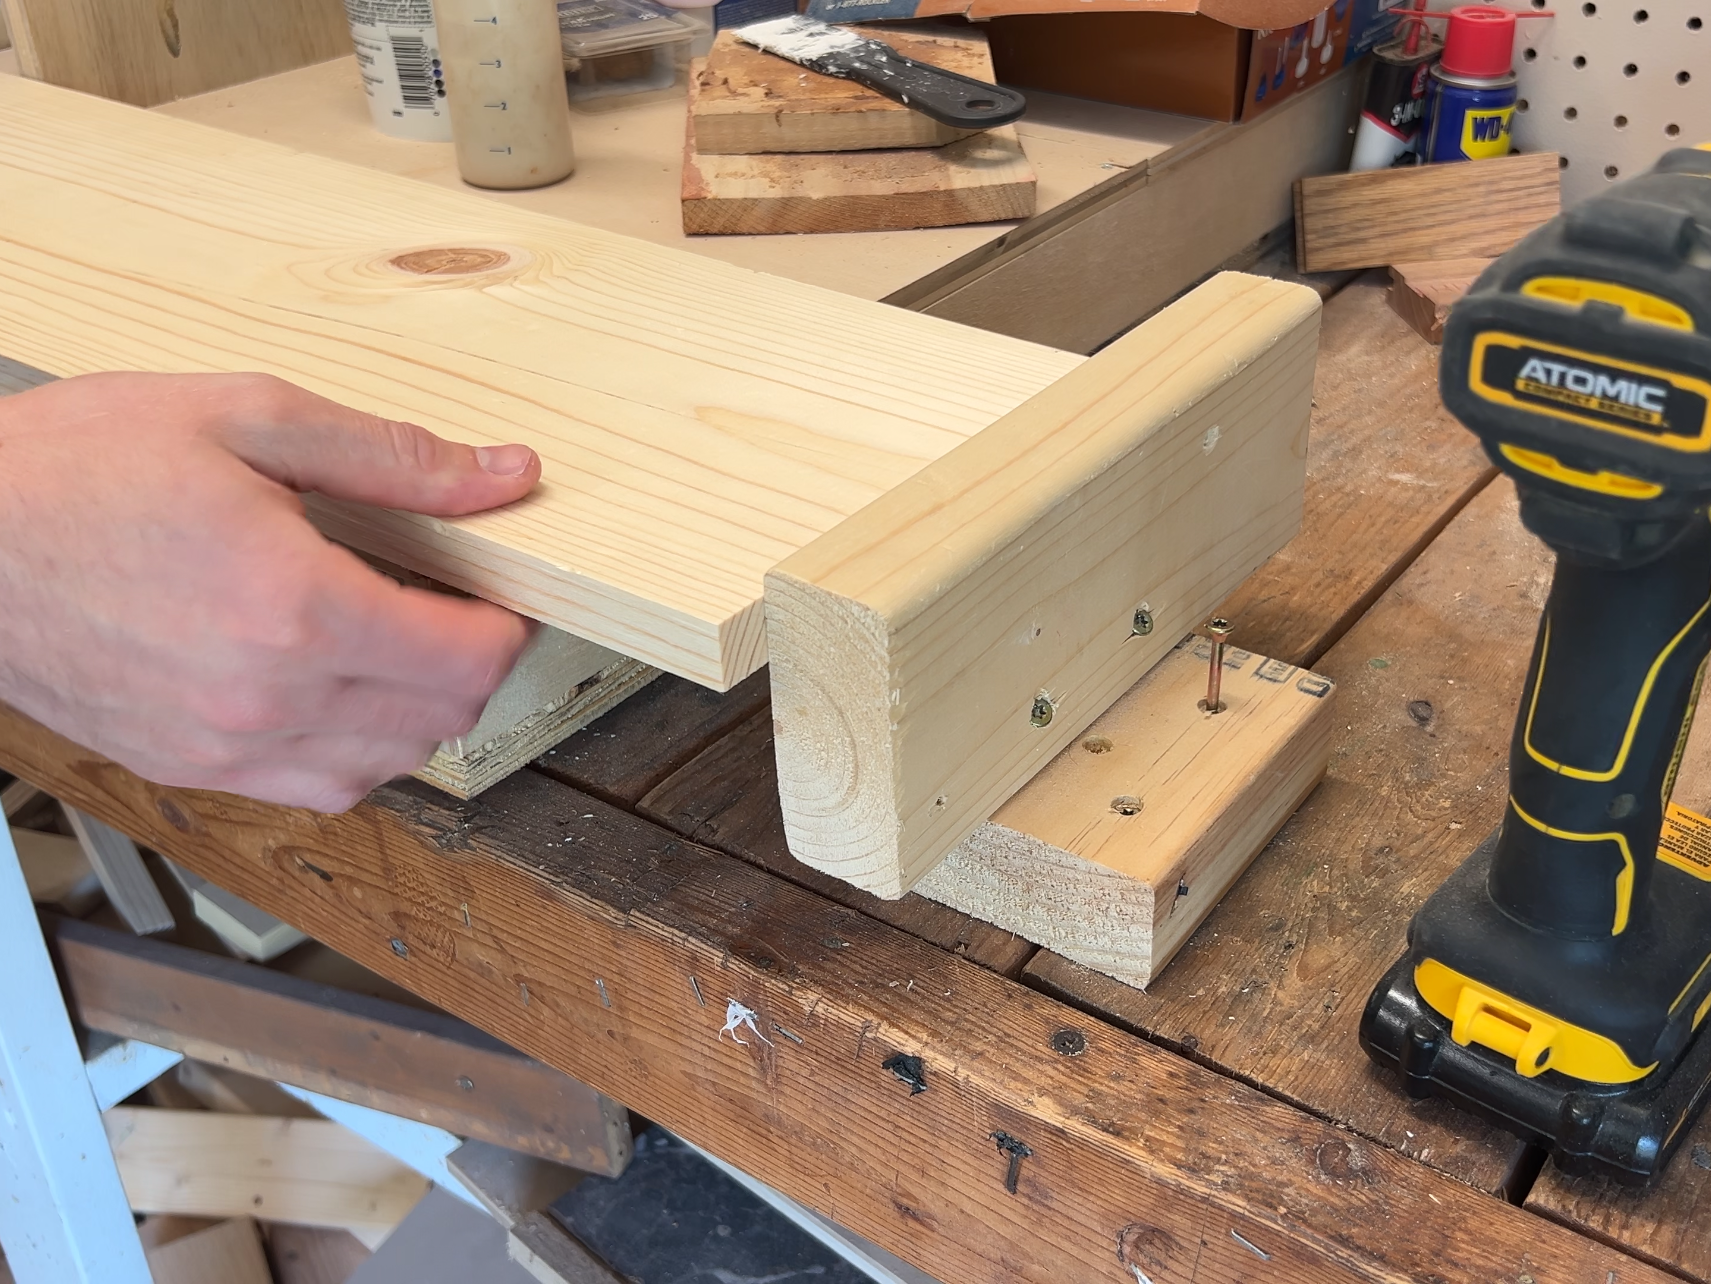
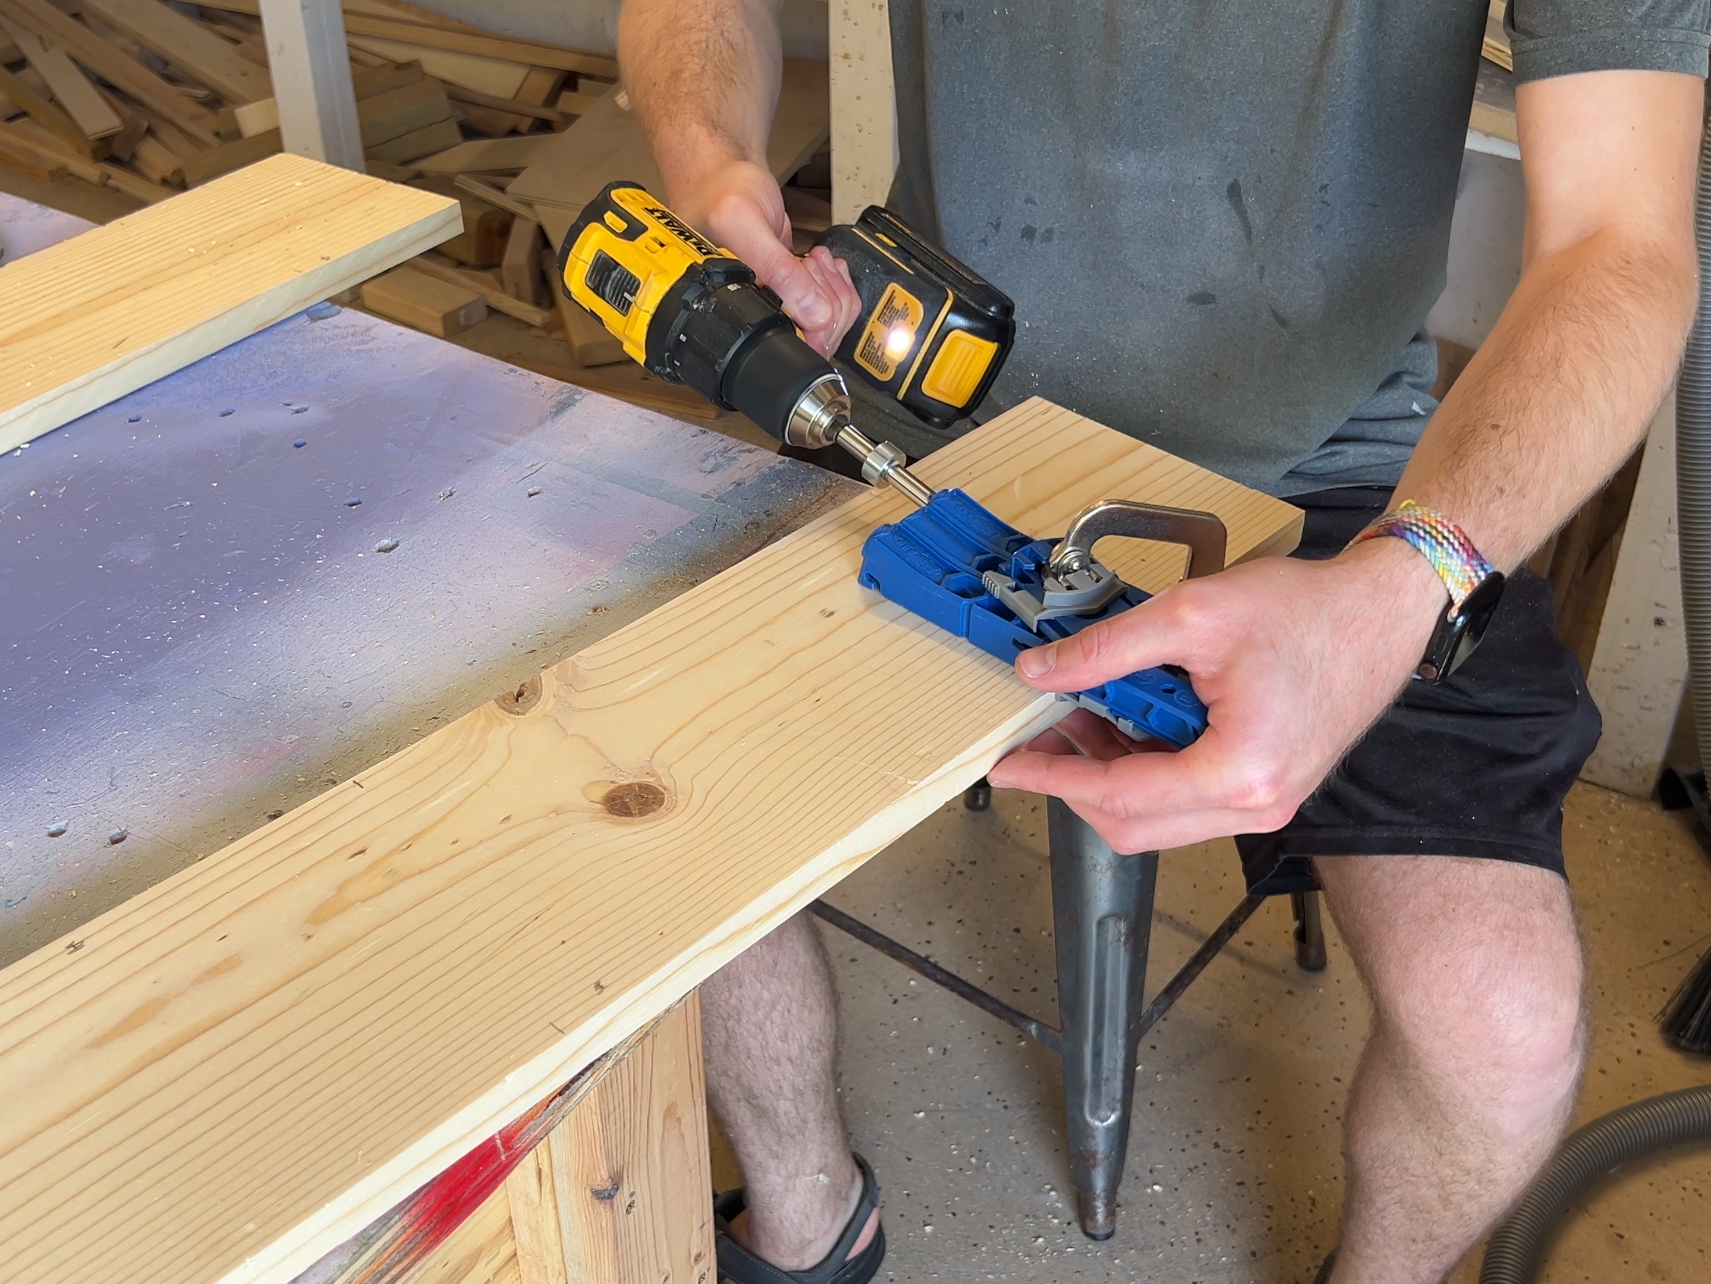
1-by boards are 3/4″ thick, so we should use 3/8″ dowels. The Kreg dowel jig provides a 3/8″ hole size. I put a 3/8″ drill bit in my drill and used some painters tape to drill about half the length of the dowel. Remember to take into account the jig height!
I clamped my boards together so the sides were flush and used a ruler to mark 3 lines on the boards where they met. This is where we’ll align the dowel jig. Take the boards apart and we’re ready to drill!
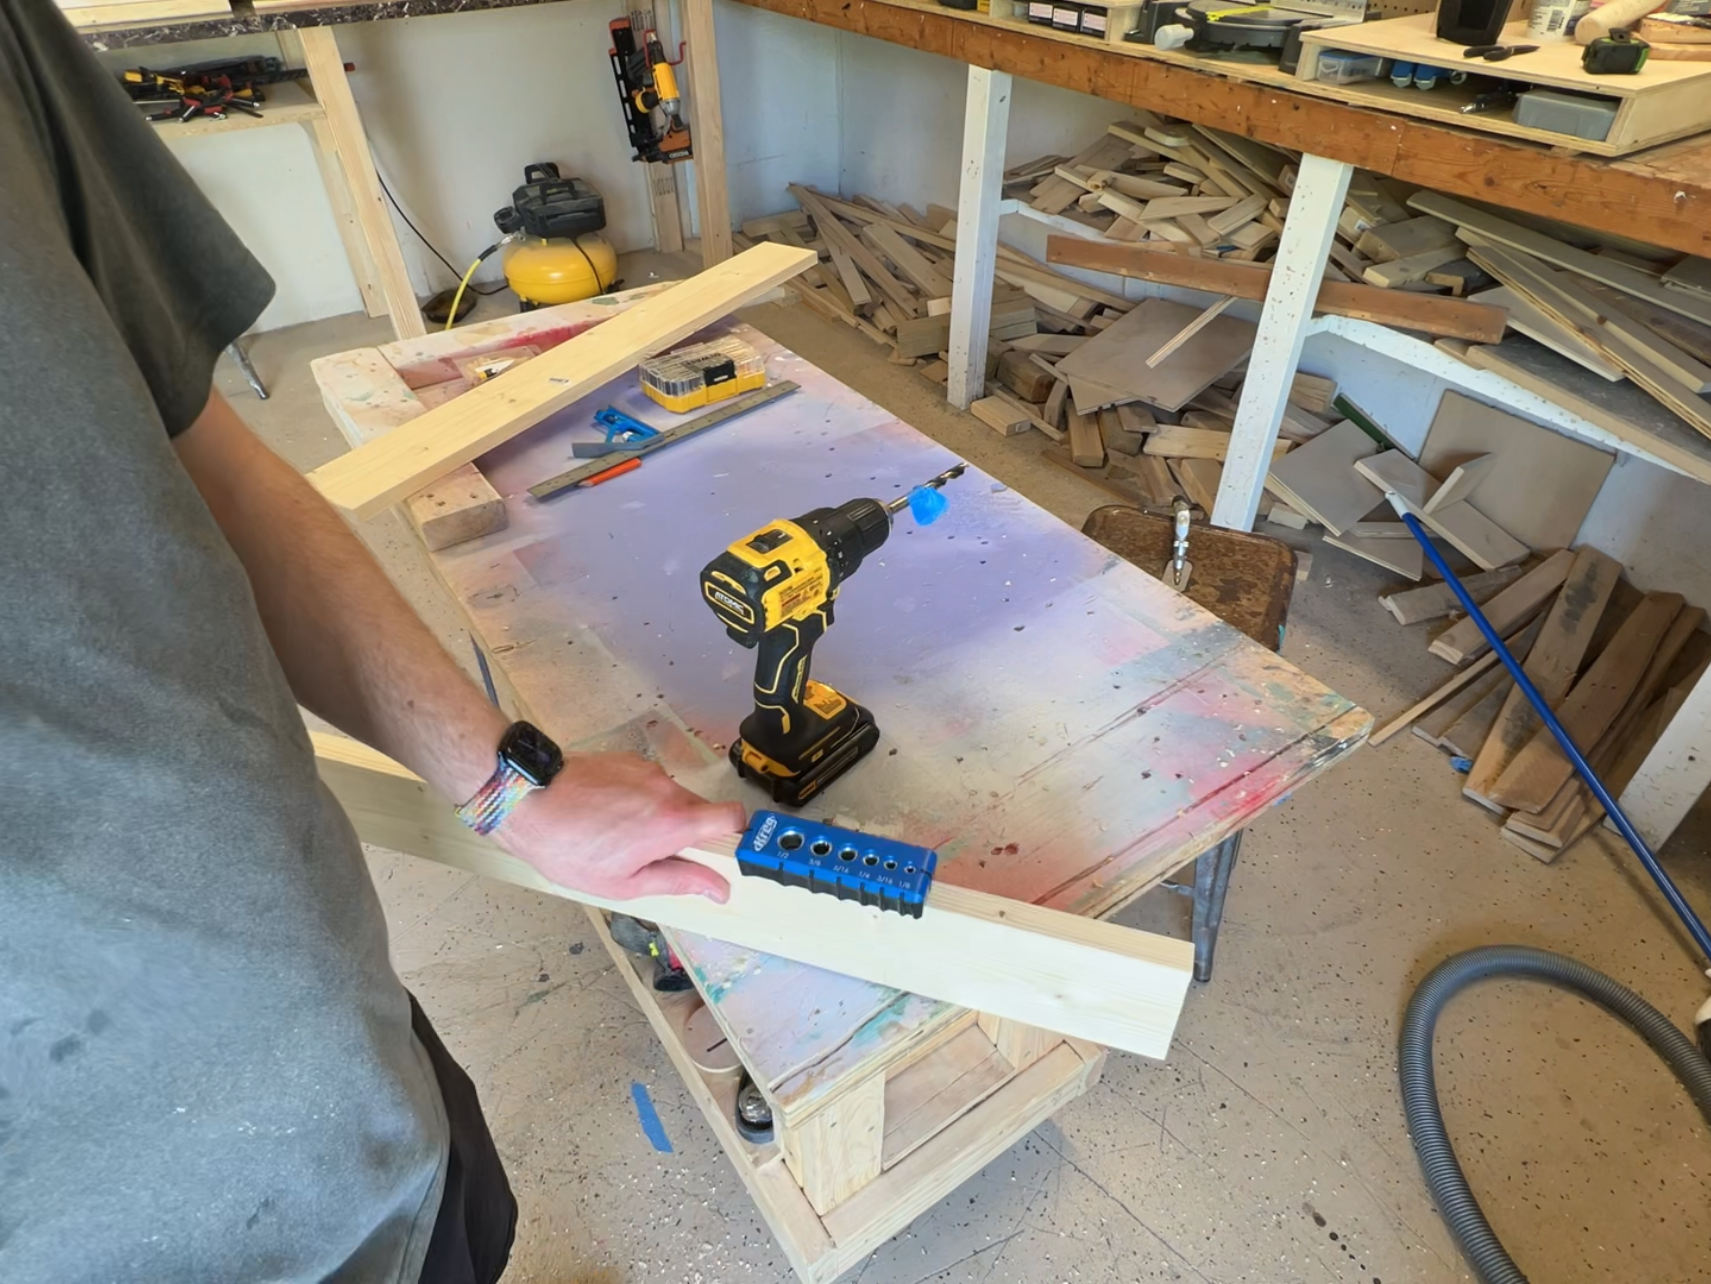
Drilling dowels requires some patience and practice. The Kreg dowel jig self-centers on 3/4″ boards, but can be a little tricky to get the right placement on your lines. Take your time and try to line up the jig as perfect as possible for each dowel. I used a clamp to clamp the jig to the board and to my workbench. I found it easier to drill when it was clamped to my workbench too.
After all your holes are drilled, it’s time for a dry-fit. Put dowels in each hole on one side of each of the boards. Attach your boards and lightly clamp them together. How well did your lines match up? Most of mine didn’t match, but I was able to see how my alignment improved with each board. If yours don’t match either, don’t worry! Use your circular saw and straight edge (like a Kreg Accu-cut or just a level clamped to your boards), trim off the uneven edges to get them nice and flush.
Pocket Holes
Similarly to dowels, I lined up my boards but flipped them over to drill into the back sides. I made 3 pocket holes on all the joint sides (no need to do the top and bottom). The boards will screw into each other and once glued they’ll be super tight.
When drilling the pocket holes set your guides to 3/4″. Be sure to stagger their spacing so your screws don’t go into each other on the boards. With the pocket hole approach we don’t need to dry fit since we’ll be able to line them up perfectly when joining with glue and screws.
🎨 Painting
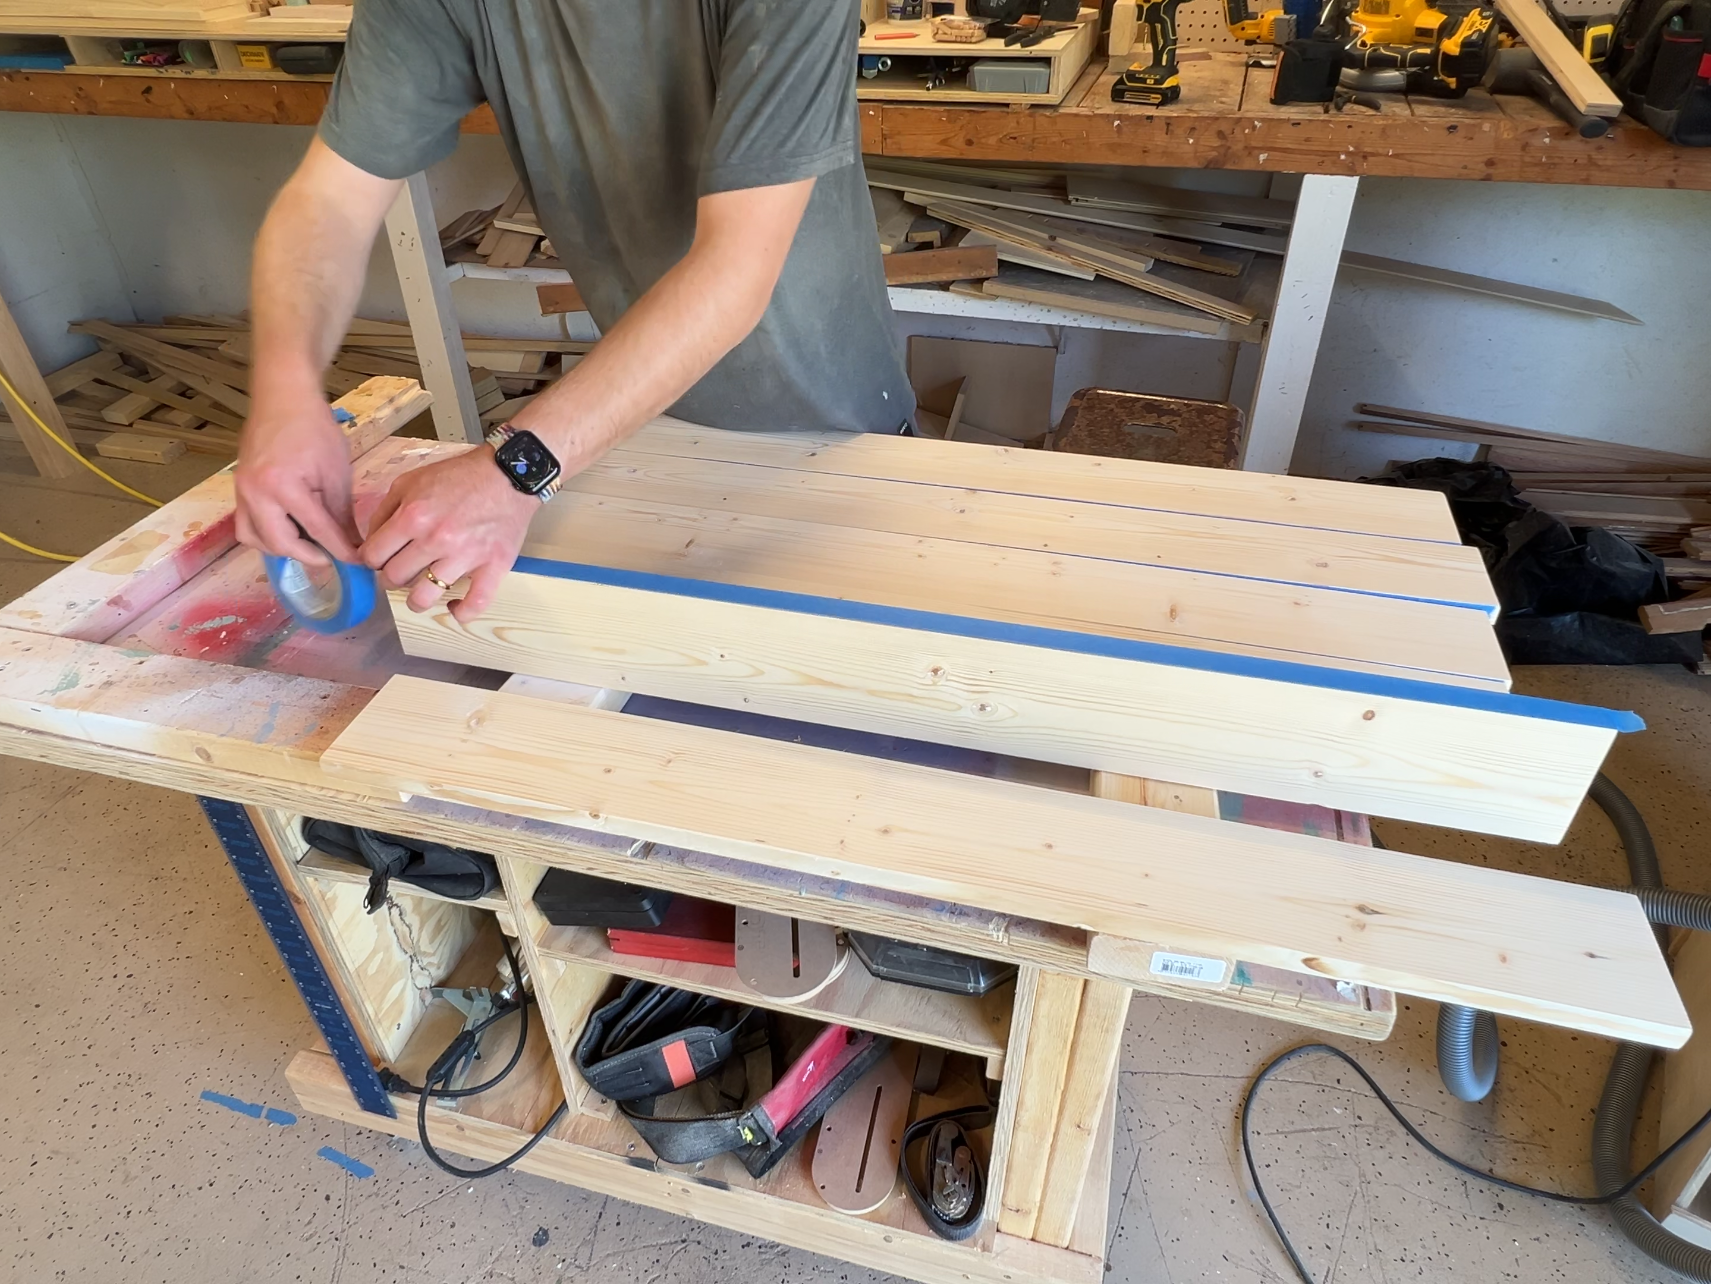
I debated on the approach for painting the flags, but I’m happy with the approach I took. I decided to paint each piece separately before joining so that each board was a separate color. The alternative would be to join the boards and use painters tape to tape off each board. The first step before painting was to use painters tape on the edges that will be joined. We want the wood glue to join the raw wood rather than paint.
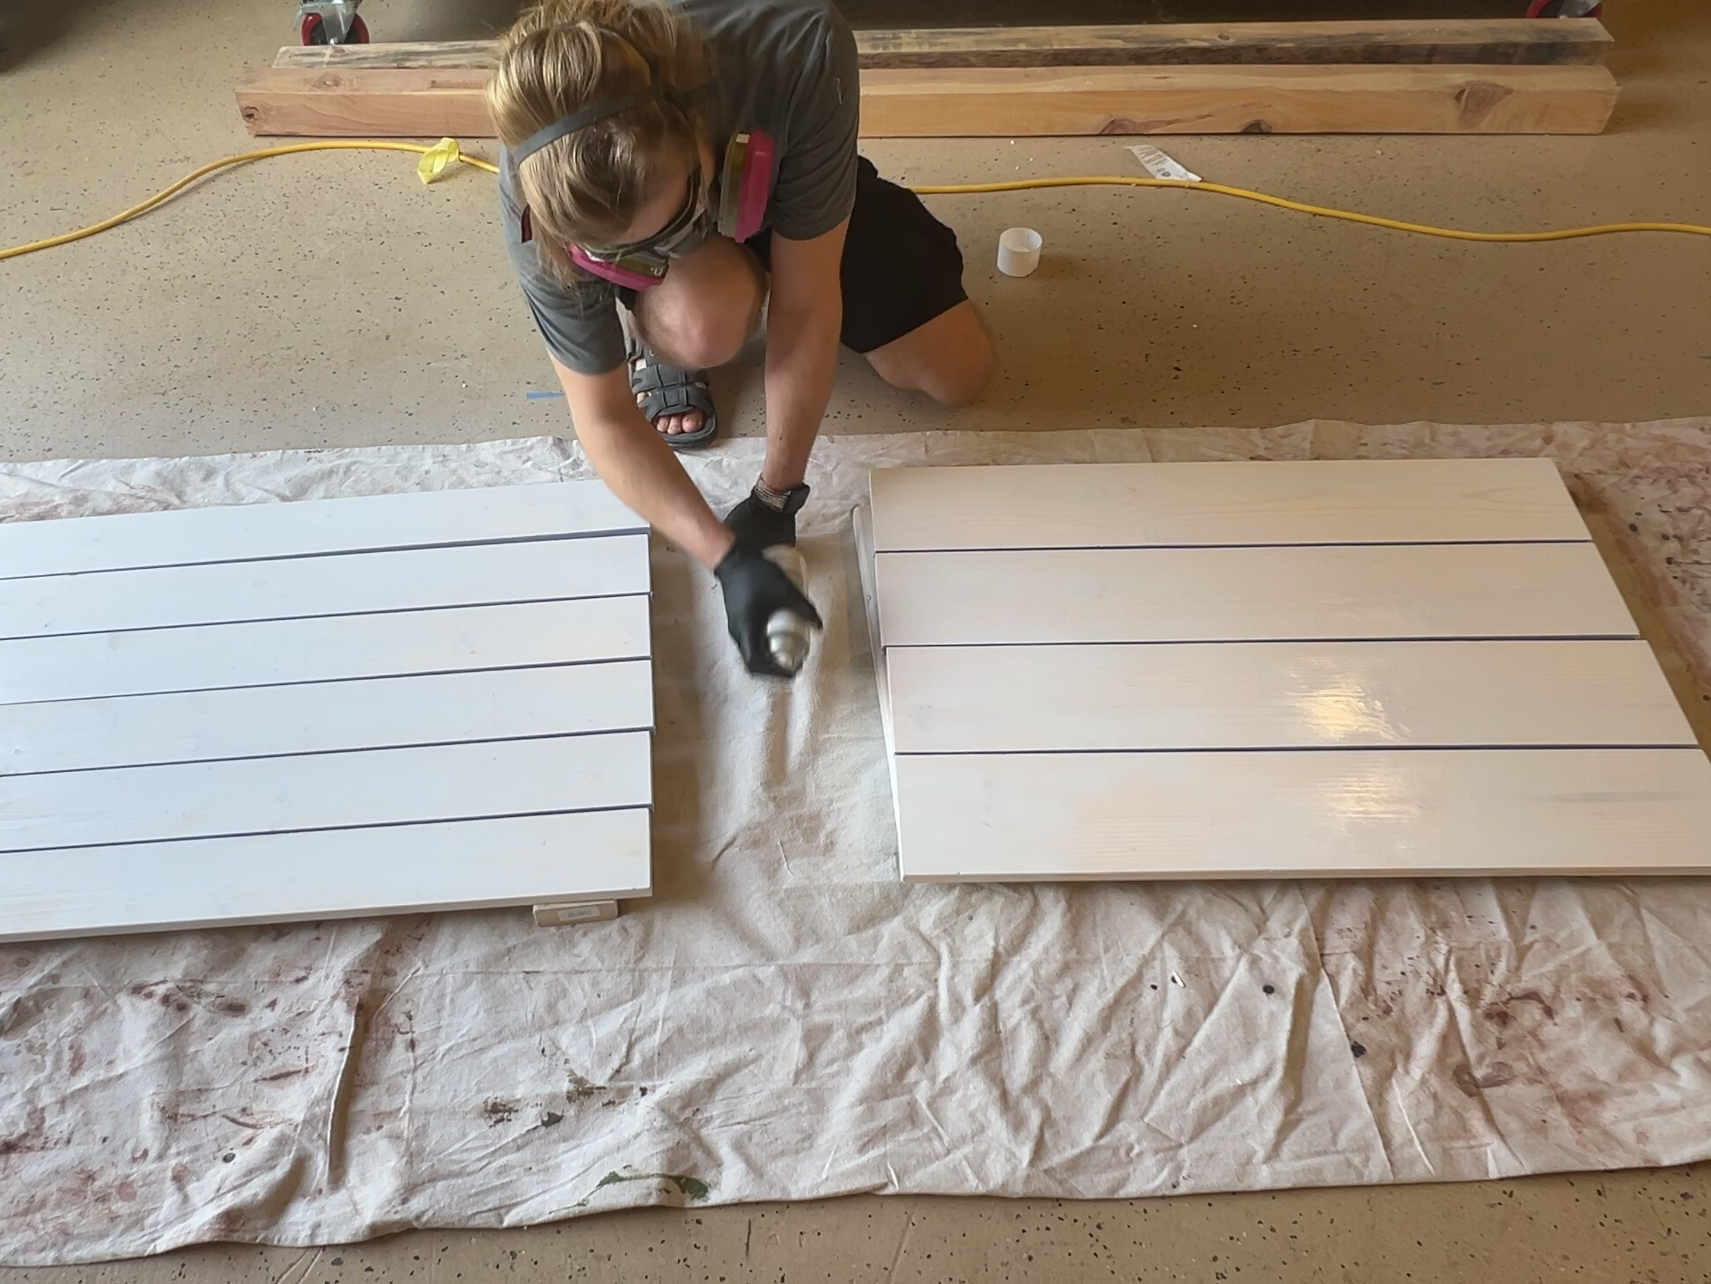
Priming
You can use the spray paint I linked above without a primer since it’s paint and primer in one, but I still like to do the priming separately. By using a primer first, this ensures any different colors and surfaces (like knots or filled in holes) look like one surface. Give all the boards a thin coat of primer and let dry as recommended on the can.
Colors
This is by far the longest step in the building process. It took me an hour to paint both flags. Take your time and it will turn out great!
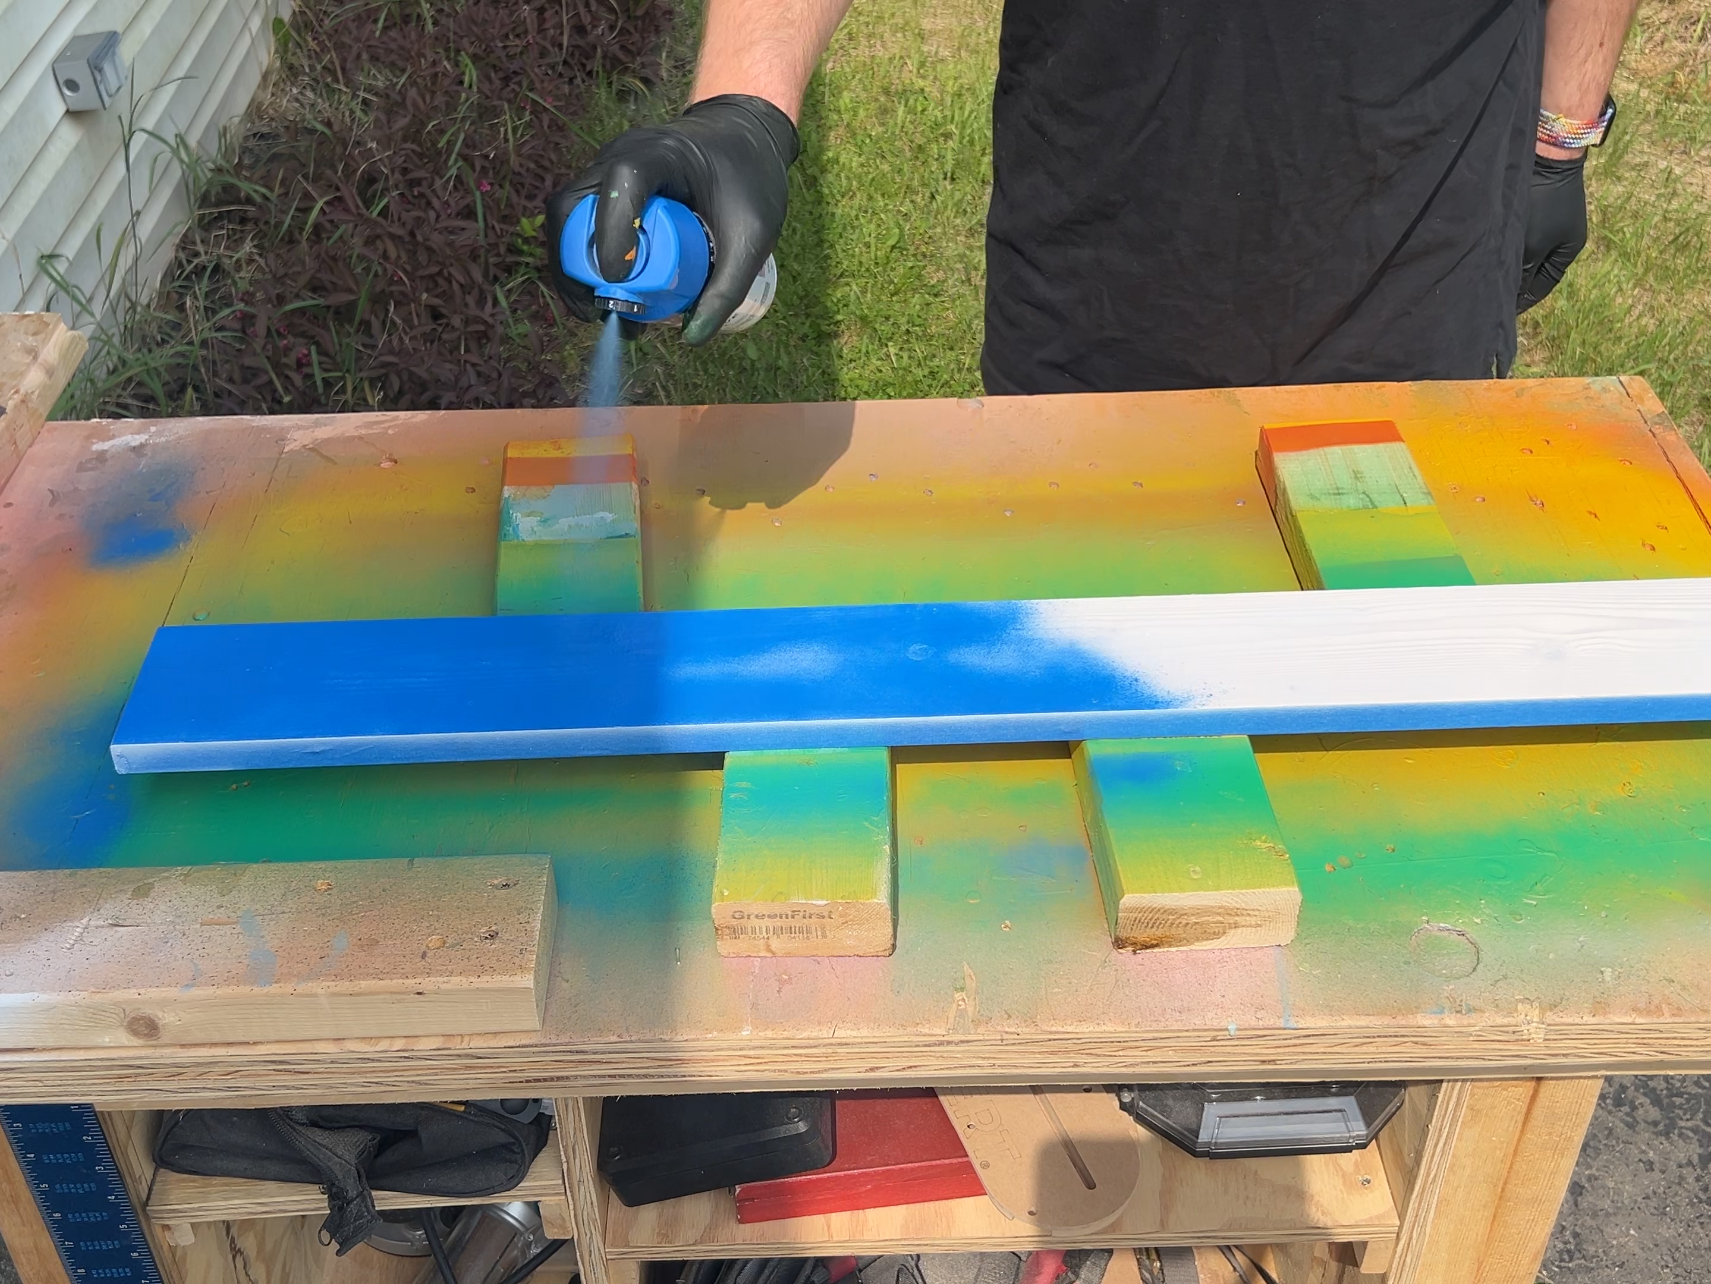
Take your boards one-by-one and ensure the color you’re painting matches the number on the list below. I did three light coats for each color, waiting three minutes between coats. It was super hot when I was painting, so they dried quickly.
LGBT pride flag:
- Red
- Orange
- Yellow
- Green
- Blue
- Purple
Non-binary pride flag:
- Yellow
- White
- Purple
- Black
🗜️ Assembly
Before assembly, take the painters tape off the edges that we’re going to glue up now. To avoid getting marks on the newly painted boards, I put down some construction paper on my pipe clamps. This will also help keep your workbench clean from glue drips.
Glue and Clamps
When using only glue and clamps, it’s a bit difficult to prevent the boards from sliding due to the glue when clamping. Line up the boards on the clamps and apply some glue on one edge of each board that needs to be glued up. Take some 60 grit sandpaper and rub it together on itself to get some of the grittiness in the glue. This will help prevent the boards from sliding apart when we clamp them.
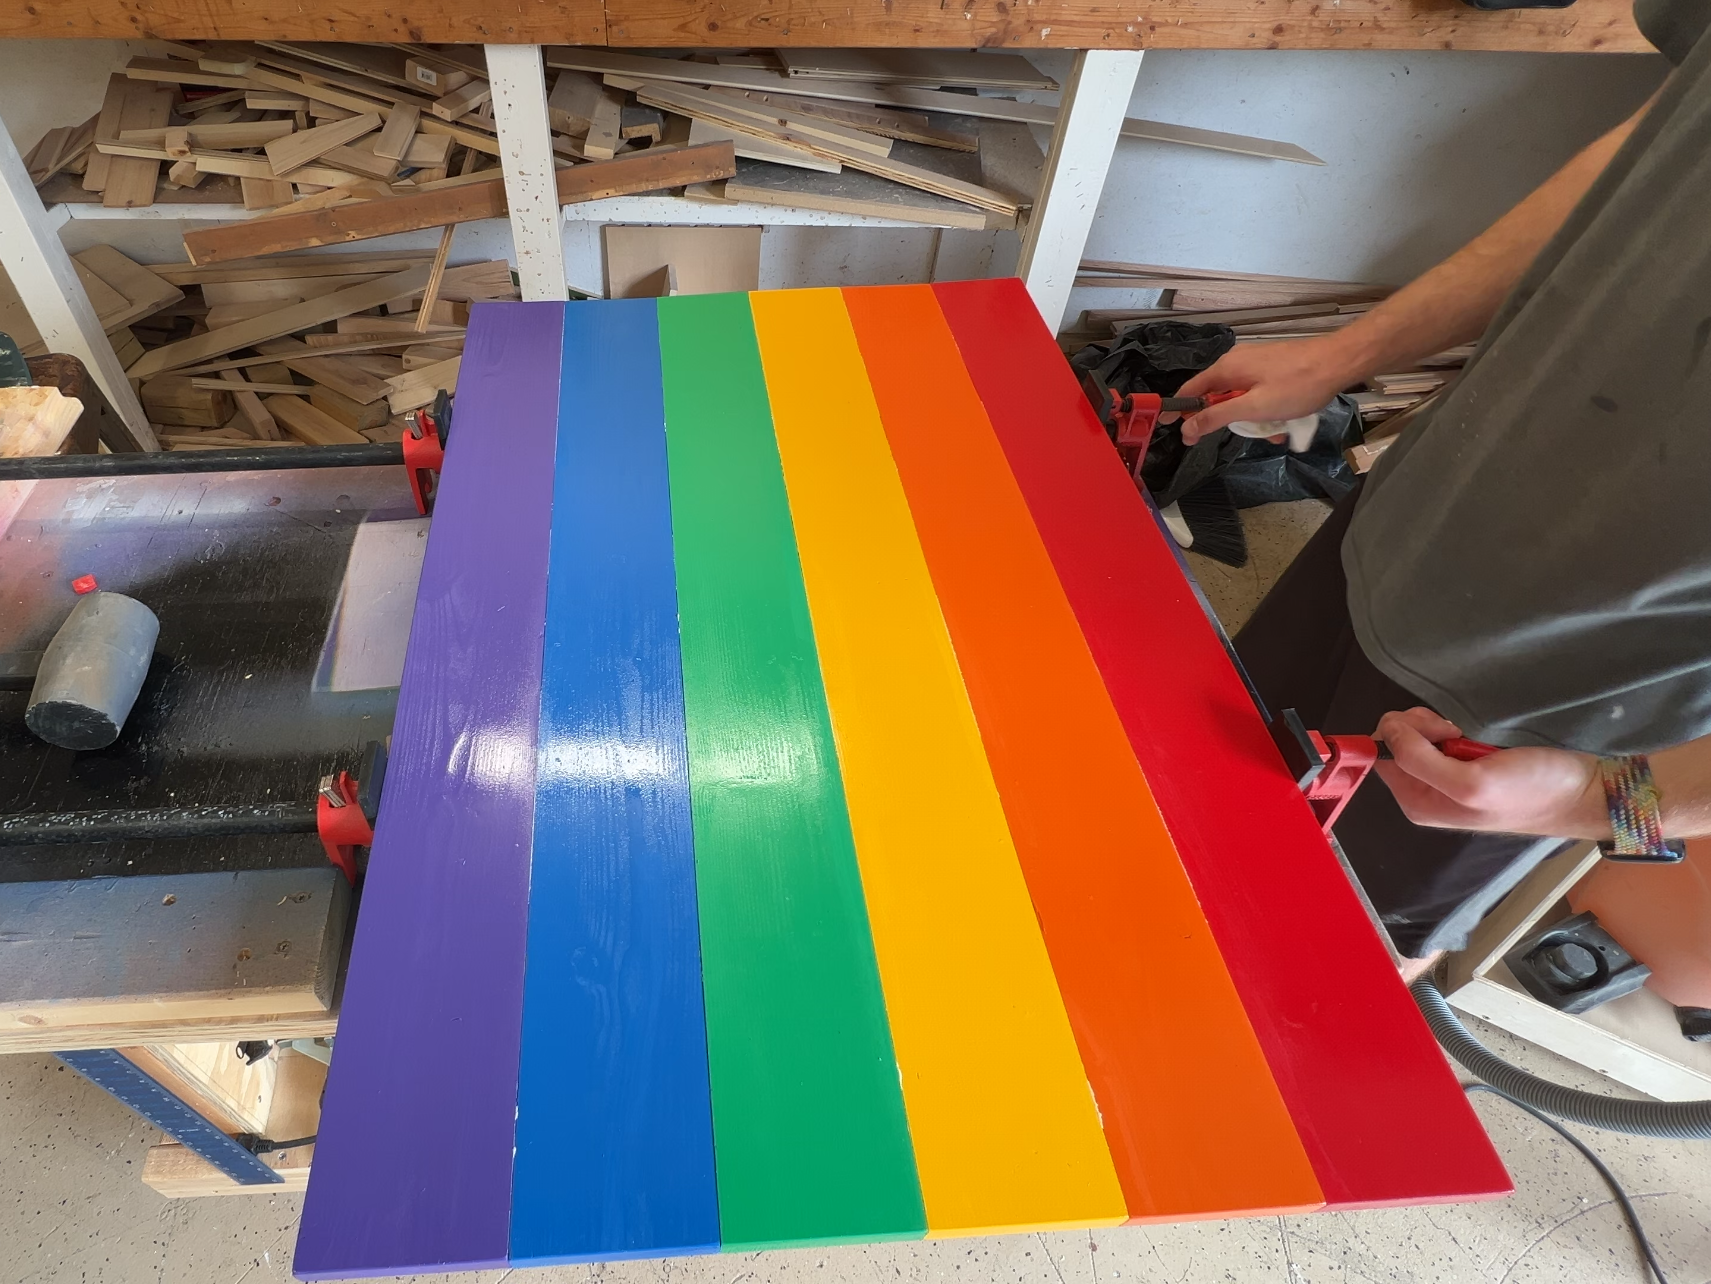
Lay the boards down and start to clamp the boards together. Do this slowly and wipe off the excess glue that squeezes through, immediately, using a damp rag. If your boards start to bow, then using a clamp on each side with some scrap wood to clamp it flat. Let the glue dry overnight.
Dowels
Put dowels in one side of each board, squeeze a bit of glue in the hole before inserting the dowel. Add some glue to the sides of the boards with dowels and wipe some glue on the dowel sticking out too. Dowels don’t add much strength but they help keep our boards aligned when clamping.
Lay the boards down and start to clamp the boards together. Do this slowly and wipe off the excess glue that squeezes through, immediately, using a damp rag. If your boards start to bow, then using a clamp on each side with some scrap wood to clamp it flat. Let the glue dry overnight.
Pocket Holes
For the pocket hole joinery method for the flags, lay the boards upside down on your pipe clamps and ensure they’re in the correct order. Apply glue on one side of each board. Lay the boards back down and lightly clamp them together. The clamps are just ensuring the boards don’t move while we add the pocket hole screws. Add screws to all the pocket holes, alternating sides being joined.
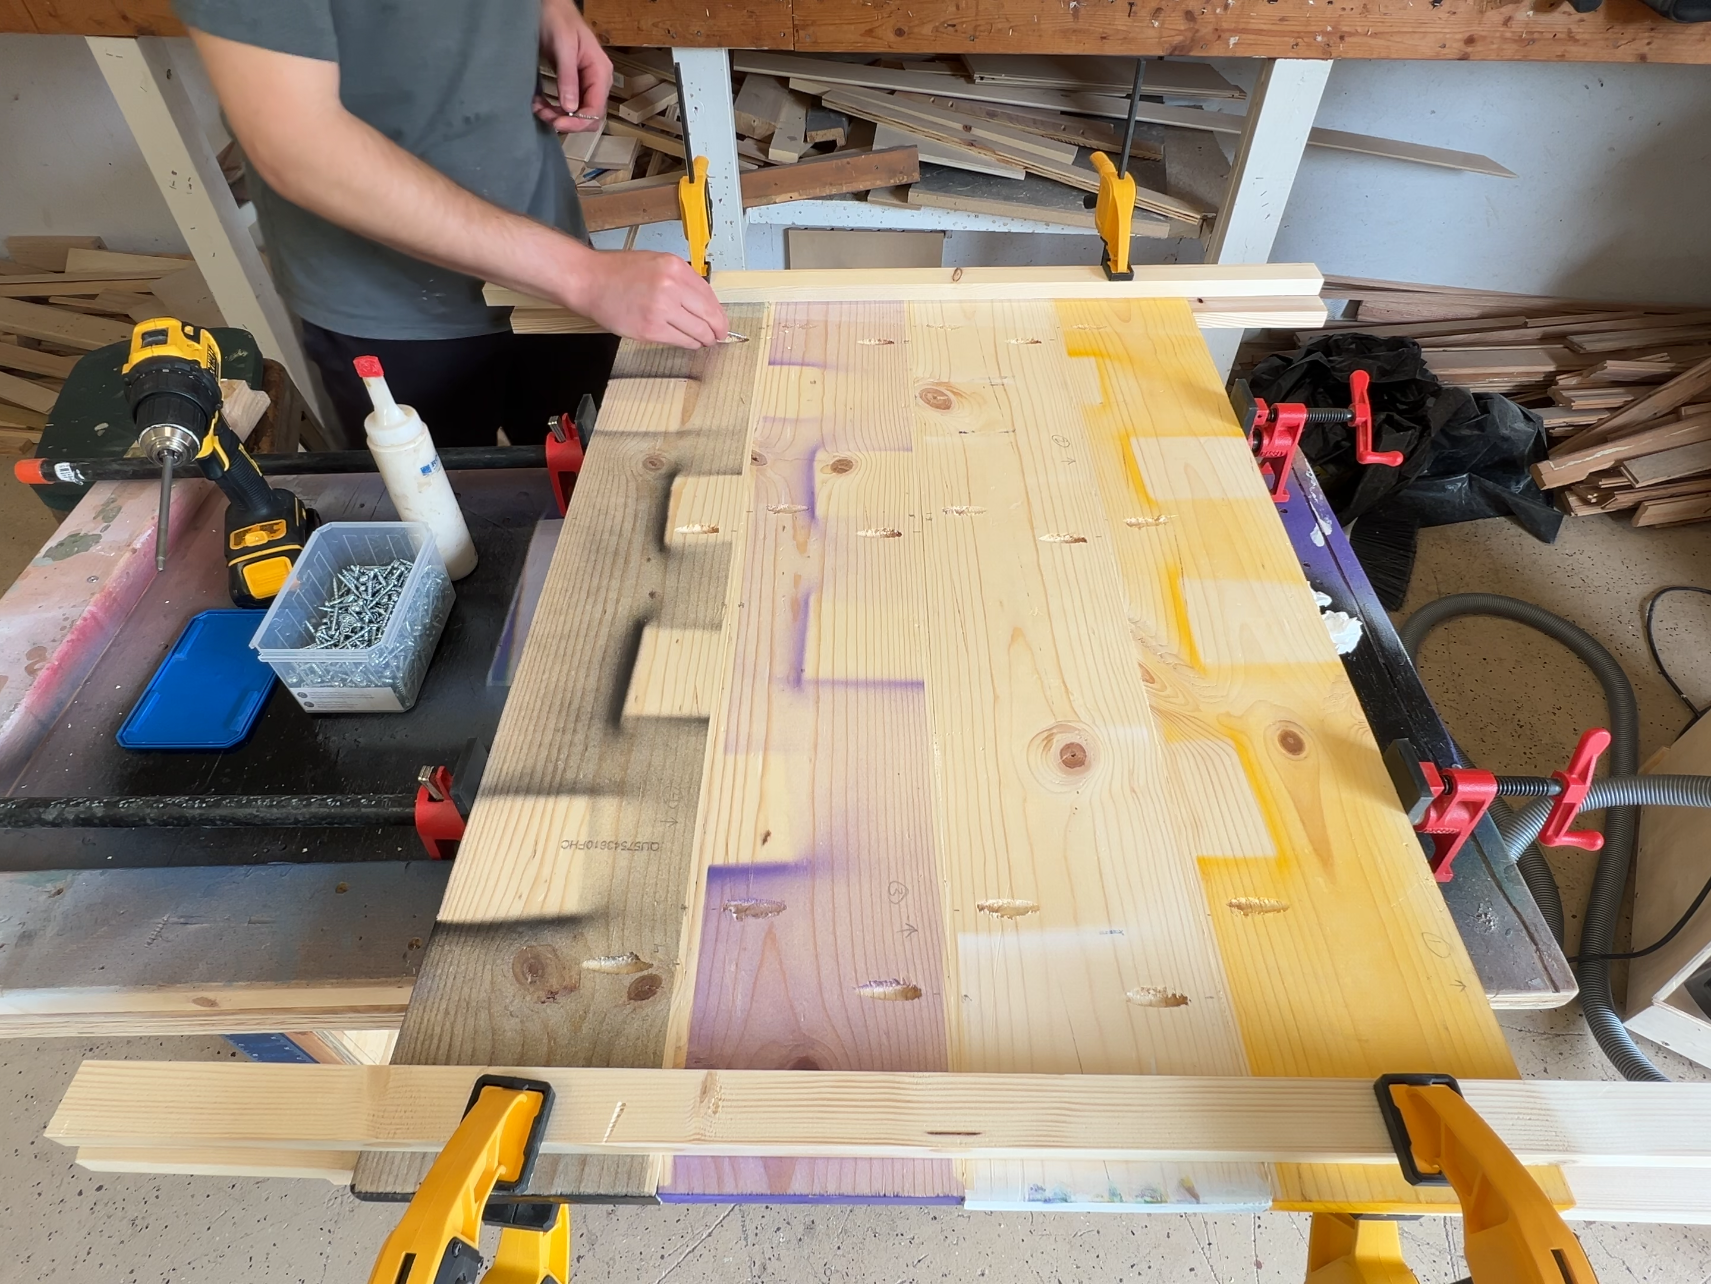
After all the screws are in, take the clamps off and flip the flag over. Wipe off the excess glue that squeezed through, immediately, using a damp rag. Let the glue dry overnight.
🔨 Hanging Up
Our flags aren’t too heavy, but I always opt for the next size up when hanging things. I used D hooks that are rated for 75 lbs and picture hanging wire rated for 100 lbs. Flip the flag over to attach the hooks and wire on the backside of the flag. Place the hooks about 1/3 of the way down from the top at a 45 degree angle.
If you haven’t used picture hanging wire before, it can be a bit tricky at first. Wear protective gloves to protect your hands from cuts.
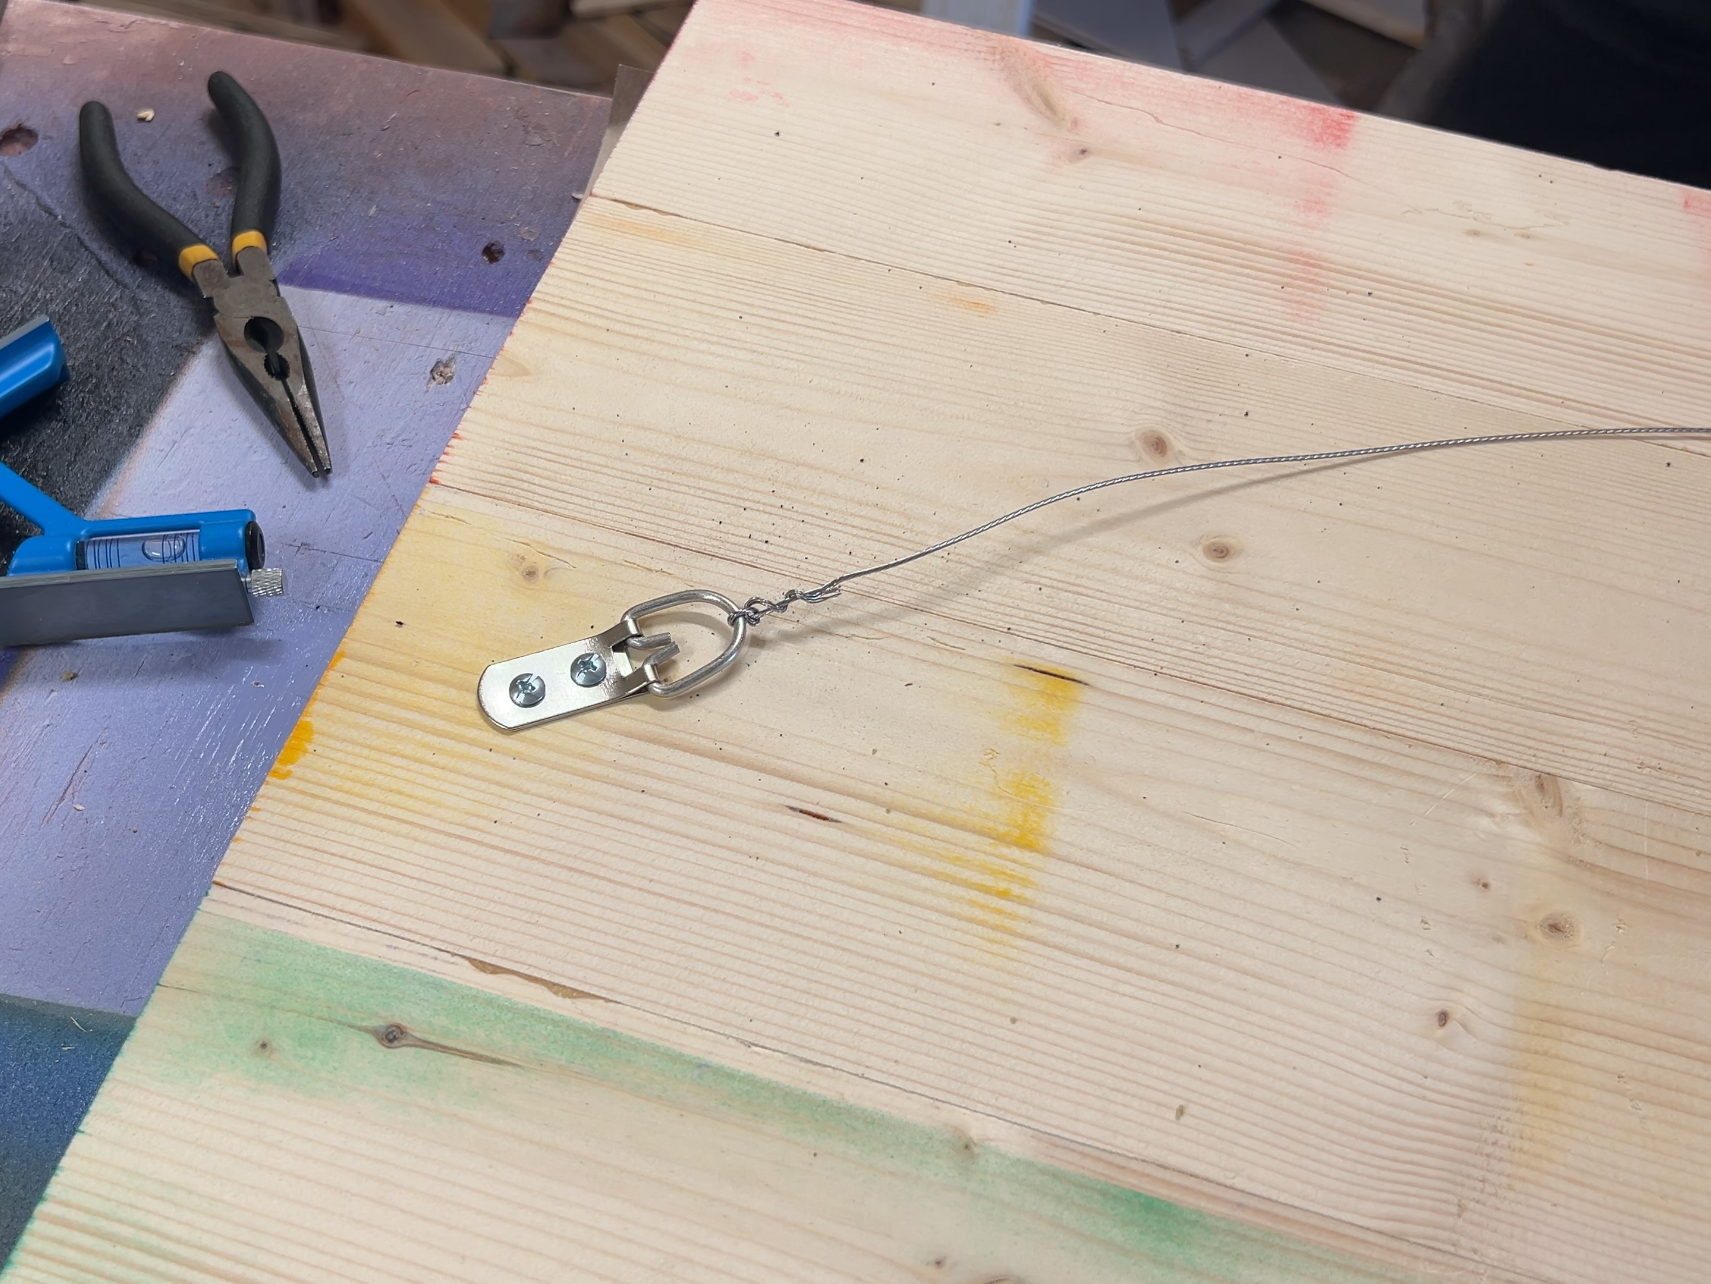
Take one end of the wire and push it through one of the hooks until about 2-3″ is through. I bend the wire to know where I want it to be. Make a simple knot with the end and then wrap the extra around the rest of the wire, pull it tight.
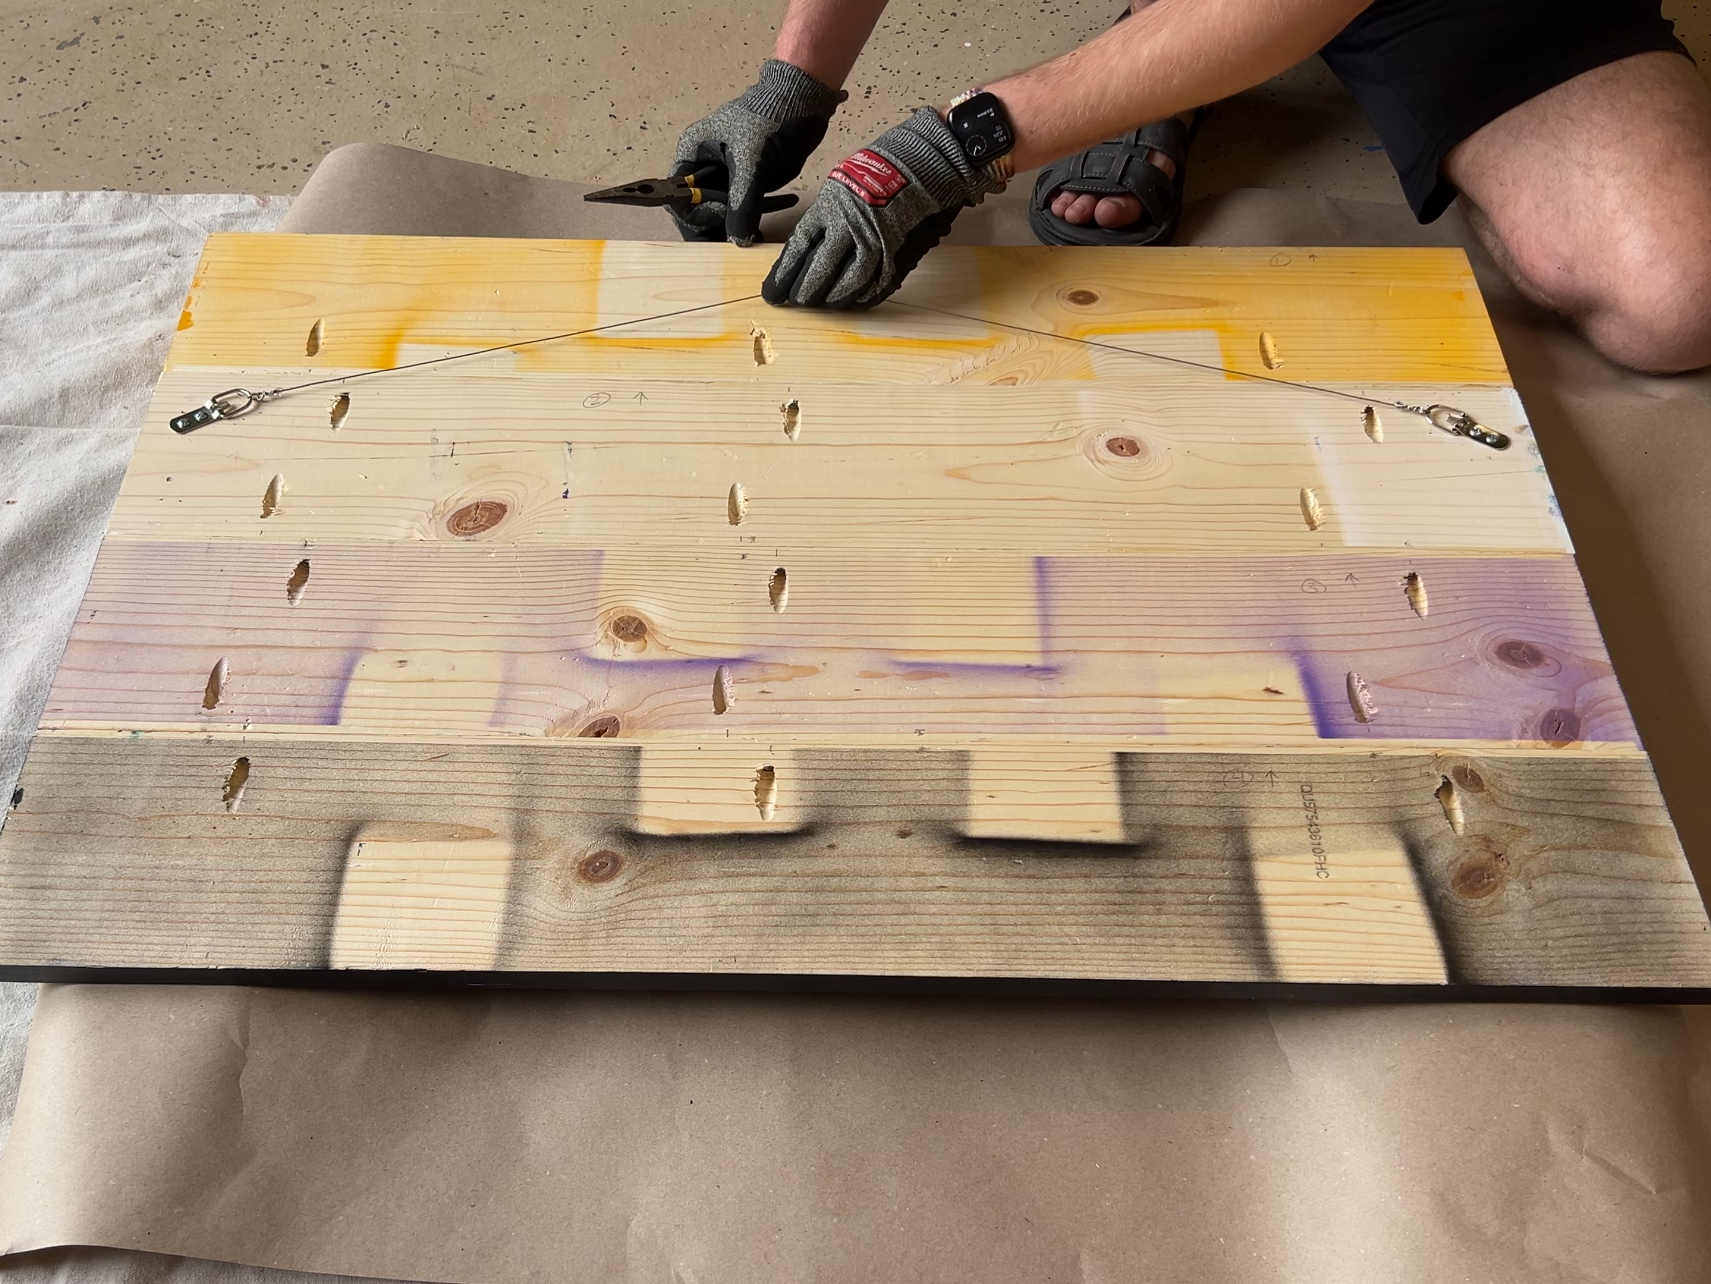
Make a mark 3″ from the top of the flag. This is where the peak of the wire should be. Pull the wire tight and hold it with one hand as you push the wire through the other hook. Follow the same process as before, but you’ll need to cut the wire leaving 2-3″ to tie on this hook end.
Pull the wire tight and make sure it doesn’t come loose from either hook. If it does, try to wrap it tighter using some needle-nose pliers.
When hanging the flag on your wall, be sure to use a picture frame hook for at least 50 lbs. Alternatively, you can use a wood screw into a stud in your wall.
🎉 You did it!! 🎉
Congrats on building your pride flag! Whether this was your first project or tenth, it’s a great accomplishment. Share your flag on Instagram with #EnbyDIY for a chance to be featured in a future video!

Get the full build plans for all the varieties over here. Join our community and discuss your build!

Leave a reply to Pride Flags Easy DIY (without table saw) – Enby DIY Cancel reply